


Frequently Asked Questions
Rug Tufting 101
Discover what you can make using a tufting gun and get the lowdown on the essential supplies you’ll need to get started.
What is tufting?
Tufting is a textile manufacturing technique where a thread is inserted through a base fabric. Modern tufting involves the use of a machine called a tufting gun. A tufting gun is a hand-operated power tool used to accelerate the tufting process. It works by feeding yarn through a needle that rapidly punches an upright stretched piece of fabric.
What can I make with a tufting gun?
With a tufting gun you can make a wide variety of textured textile products. Make rugs, tapestries, wall art, stool covers, mirror frames, cushions and even clothing. The design possibilities are endless!
What do I need to start tufting?
Tuftbox sells everything you need to get started, explore our starter kits and check out our ultimate guide to tufting supplies.
Is tufting expensive?
It all comes down to the materials you choose and the complexity of your project! Our ultimate guide to tufting supplies can help you find affordable options. We offer a range of tools and materials to fit different budgets, so you can start tufting without breaking the bank!
What are the best materials for tufting?
Our ultimate guide to tufting supplies is a handy breakdown of the essential materials you’ll need to complete any tufting project. The guide includes the best supplies available in the UK so you can get started tufting like a pro right away. On a budget? We’ve got you. The guide also has wallet-friendly picks for all of the tools and materials you’ll need to get tufting.
What is the difference between cut and loop pile?
A tufting machine uses a mechanical needle that pushes yarn through the weave of a primary tufting fabric.
- A loop-pile machine punches yarn through the tufting cloth in a continuous cycle, leaving loops of yarn.
- A cut-pile machine pushes yarn through the fabric weave and cuts the fibres as it comes through to the front of the piece, resulting in an upright pile with both ends of the yarn exposed.
The result is two very different finishing styles - cut-pile rugs have a dense fluffy pile and loop-pile rugs have more of a knobbly texture.
Check out our blog Cut Pile vs. Loop Pile to find out more about the benefits and potential downsides of both styles.
What is high pile and low pile?
"Pile" refers to the density, height, and length of the fibres that make up the surface of a rug or carpet. The pile can either be low or high depending on the length of the fibres. Check out our guide to rug piles to learn more!
Your First Tuft
Expert tips for your first time using a rug tufting machine.
I've got my tufting gun! How do I get started?
Welcome to the tufting club! 🔥 Here are our top tips to get you started:
- If you haven’t already lost hours on #Rugtok 👀 make sure you check out videos from other creators to get a feel for the craft and get inspired.
- If you bought your machine from us, read through the manual included in the box, it has all the info you’ll need to get tufting!
- Follow our steps in this FAQ for getting your frame, fabric and yarn set up.
- Before you handle your tufting gun read through our guide to safe tufting.
- Don’t plug in or switch on your machine straight away.
- Attach the handle of your tufting machine, you can find a guide below.
- Practice threading your tufting gun whilst it is turned off and unplugged. See the how-to guide for threading your machine below.
- Now you are ready to plug in and turn on your machine, hold it firmly by both handles and make sure the front of the machine is facing away from your body, pull the trigger and check that it is operating. Turn off the machine and adjust the speed dial. You want to start tufting with the machine on the lowest speed setting!
- Follow our step by step guide to tufting your first lines - this can be found below under the question “How do I tuft my first lines?”
How do I attach or remove the handle on my tufting machine?
AK tufting machines are often shipped without the front handle attached to prevent damage during transit. Line up the handle screw with the hole on the metal ‘L’ shaped plate at the front of your machine and screw it in securely. To remove the handle, simply unscrew the handle from the plate, make sure you put it in a safe place for reinstalling later.
How do I thread my tufting machine?
All AK tufting machines are threaded with a yarn threader. If you purchase an AK-I machine from us, it will come with a threader in the box for you to get started straight away. Tuftbox also stocks fun varieties of tufting gun threaders - if you are looking for an upgrade check out our hands threaders ✌️ and our solid handle threaders. You can also make a threader at home by bending a large paperclip or a piece of wire into a thin hook.
Make sure your machine is switched off and unplugged, you are now ready to start threading your machine:
- First bring your strands of yarn through the yarn guide, this is the coiled wire loop located at the top of your machine.
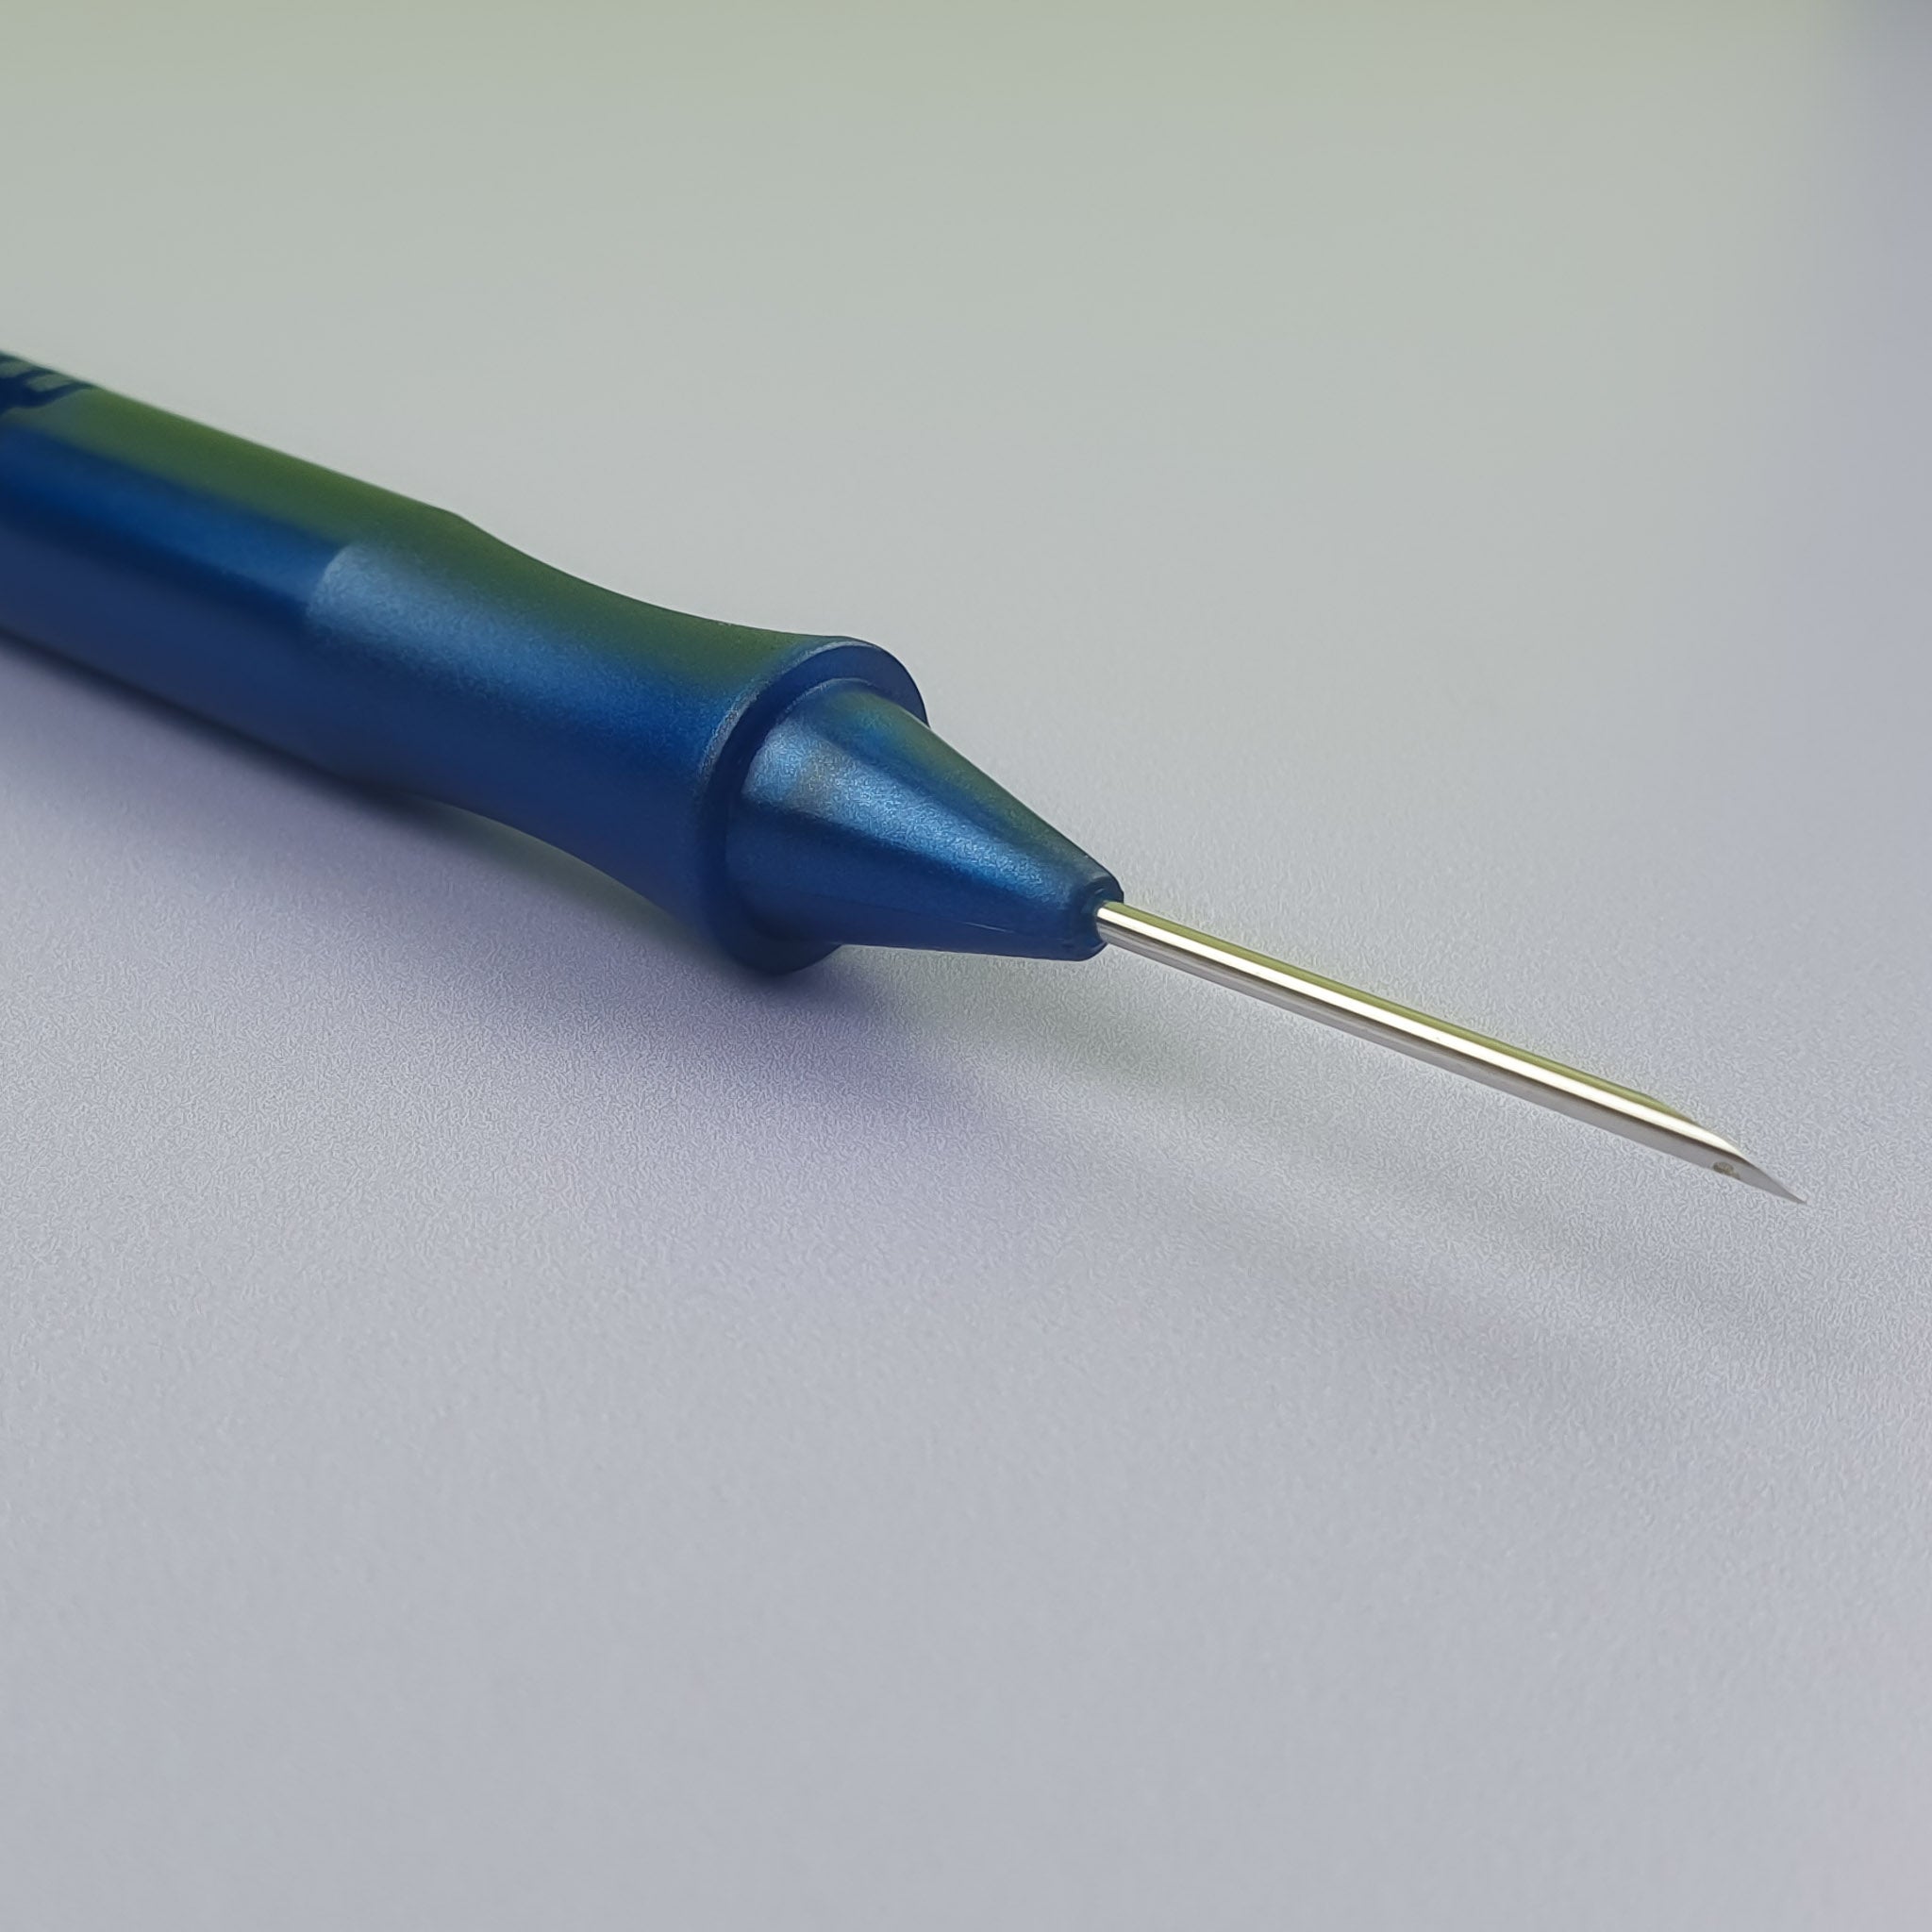
- Insert your threader up into the eye (hole) of the needle. The needle of your AK-I tufting machine is located at the front of the machine. The AK-I has a flat tipped needle and the eye is towards the front.
- Next put your yarn strands into the hook of your paperclip/wire or the loop of your yarn threader.
- Pull your threader back down through the eye of the needle until the yarn is through the needle hole.
How do I tuft my first lines?
Once you have everything set up, you have read through the tufting safety information and you feel confident to start tufting you can follow the steps below to lay your first lines!
- With your finger off of the trigger, push the gun firmly into the fabric. You will want to push the needle into the fabric so that the foot of your tufting machine is in contact with the tufting fabric.
- Make sure your tufting machine is at a 90 degree angle to the tufting fabric.
- With your hands on both handles, pull the trigger and move the gun up the fabric.
- You might find that your yarn has unthreaded from your tufting machine, don’t worry! It takes a little practice to get the right speed and pressure. Unplug and re-thread your tufting gun and then try another line.
- Continue creating straight lines moving the gun up the fabric (from bottom to top) until you get used to handling the machine.
Rug tufting guns
Interested in making your own rugs but you've got questions about rug tufting machines? You're in the right place.
What are the differences between tufting guns?
When it comes to choosing between tufting guns the biggest decision you’ll have to make is whether you want a cut-pile, loop-pile or dual machine.
- Loop-pile machines - punch yarn through the tufting fabric in a continuous cycle, leaving loops of yarn. Loop-pile rugs have a knobbly texture.
- Cut-pile machines - push yarn through the fabric weave and cut the fibres, resulting in an upright pile with both ends of the yarn exposed. Cut-pile rugs have a dense fluffy texture.
- Dual machines - also called ‘duo’ machines, these tufting guns can perform both cut and loop pile tufting.
Cut-pile tufting machines are chosen by over 90% of tufters because they’re easy to master, create great-looking rugs, and are a more affordable option than dual-gun alternatives. Want to learn more? Head to our blog where we compare the pros and cons of both cut and loop tufting styles.
What version of the AK do you offer?
Tuftbox is an official UK distributor of the AK-I Cut Pile Tufting Machine. We sell the 2024 version of the AK-I which has been upgraded for maximum performance and style.
Does Tuftbox offer guarantees for Tufting Machines?
Tuftbox is a UK-based business, when you purchase a machine from us you are protected by robust consumer rights which are guaranteed by UK laws. This means you can buy from us with confidence, knowing that we’ll be ready to support you if anything goes wrong:
- In your first 30 days - we offer free returns, repairs, replacements, exchanges or refunds for any tufting machine which we identify as faulty, defective or just not up to our high standards.
- In your first six months - we offer free returns, repairs and replacements for any tufting machine which we identify as faulty or defective and if we can’t repair or replace your gun, you’ll be entitled to a full refund in most cases.
Full details can be found in our Returns Policy.
We also offer free after-sale support for all of our customers, you can get in touch with us anytime by emailing help@tuftbox.co.uk.
Tufting guns are complex machinery with lots of moving parts, for anything not covered by our policies, such as natural wear and tear, we offer replacement parts and repair services at affordable prices. Contact us at help@tuftbox.co.uk anytime and we’ll do everything we can to get you up and tufting as soon as possible.
Do I need a plug adaptor to use my AK tufting gun in the UK?
No, all AK-I Cut Pile Tufting Guns sold by Tuftbox are suitable for use in the UK straight out of the box. They have an AC/DC adapter which is fully compatible with the normal UK voltage of 230. The adaptor has a Type G plug - the standard three pin plug used in the UK.
Do you sell the real AK-I tufting gun?
Yes! Tuftbox exclusively offers the original AK-I model which has been tried and tested by thousands of people across the world. Tuftbox is currently the only UK tufting shop distributing the original AK-I Cut Pile Tufting Gun.
How can I tell if my tufting gun is an authentic AK model?
Tuftbox buys tufting guns directly from the manufacturer of the original AK-I, AK-II, AK-III and the Duo and we guarantee the authenticity of the AK-I models that we distribute. With over two decades in the tufting industry, the manufacturer behind the AK continues to deliver unbeatable performance and reliability.
There are only a handful of tufting stores worldwide distributing genuine AK models. It can be tricky to tell if your tufting gun is the real deal as there are copies that look very similar to the AK tufting machine series 🤡 👀. These copies are often made with cheaper parts making them far less reliable and prone to breaking down.
Some other models on the market include the TD-01 / TD-02 and the VK-01 / VK-02 which have a cylinder shaped trigger button (typically red). The NK-01 model (also known as "the Spider”). The GT-3 which can be identified by a big black box at the front of the machine (instead of the 4 chrome rod assembly). Other copy cat models exist and to avoid knock-offs you should keep an eye out for: machine components or spare parts that look rusted or dirty, poor quality photographs, lack of specification of the model number and finally extremely low prices.
Do you drop ship your tufting guns?
No dropshipping here! All Tuftbox products ship directly from our Kent warehouse. We take pride in our quality control and ensure that each product undergoes secondary testing and calibration before being carefully packaged, so you can trust that your tufting gun will be in good hands from the moment you place your order to the moment it arrives at your door.
How can I get help with my tufting gun?
Purchased a machine from us? We offer free after-sale support for all of our customers, you can get in touch with us anytime via emailing help@tuftbox.co.uk.
Rug Gun Maintenance
How to care for your tufting machine to ensure its longevity and performance.
What oil should I use on my tufting gun?
We recommend Hemline’s machine oil. Head to our blog to find out why sewing machine oil is the perfect tufting machine lubricant.
How to oil a tufting gun?
This varies between models and you should follow the instructions provided by the manufacturer of your tufting gun. For an authentic AK-I Cut Pile tufting gun, you can follow these instructions:
- Ensure your tufting machine is switched off and not plugged into the wall
- Every Week - add a drop of sewing machine oil to each linear bearing (the four main metal bars) by applying behind and in front of the white squares. Also add a drop to the rotating bearings at the ends of the upper and lower machine bars.
- Every Month - add a drop of sewing machine oil to each metal part that moves (you can manually twist the gear of your gun to identify which metal parts have movement).
- Once oiled you can plug in and turn on your machine. With your tufting gun far away from your body, press the trigger a few times to evenly distribute the oil.
- Add additional drops as needed until the machine runs smoothly.
How to clean a tufting gun?
You should clean your tufting machine often to ensure all mechanisms can move freely without any excess friction. Not removing fibres regularly from your machine can cause malfunctions and damage.
Remove loose yarn strands, fibres and dust from your machine using a stiff paint brush or compressed air. Do not clean your tufting gun with liquids or flammable / toxic solvents. Pay close attention to cleaning all moving parts of your tufting gun and make sure you are wearing an FFP2 mask while cleaning. You should also keep both handles of your tufting machine dry, clean and free from oil. Slippery handles do not allow for safe handling and control of your tufting machine. We recommend wiping your handles with a clean, dry cloth before every tufting session.
How long do the scissors on an AK-I tufting machine last?
This depends on how often you tuft and the types of fibres you like to use. If using wool yarn and tufting every week your AK-I scissors will last a long time before they will require sharpening or replacing. If you regularly tuft with different fibres you may need to replace more frequently. Your AK-I Tufting Machine from Tuftbox will come with a replacement set and you can also contact us at help@tuftbox.co.uk for support with repairs or replacements.
How long will an AK-I tufting gun last?
All parts of the AK-I cut pile tufting machine are replaceable and with proper maintenance you can count on your AK-I to keep on tufting for many years.
Tufting Safety
Learn how to keep yourself and others safe when tufting rugs.
Is the AK-I tufting gun safe?
Every AK-I cut pile tufting gun sold by Tuftbox adheres to the high quality and safety standards expected for all UK machinery. The AK-I cut pile tufting gun is both UKCA and CE marked, affirming the tools’ conformity with both the UK and European standards for health, safety and environmental protection.
Tufting guns are complex electrical machinery and it’s essential that every new tufter reads through our guide to safe tufting. This safety information is also included in the manual that accompanies your machine.
How can I stay safe while using a tufting gun?
Please read our full guide to staying safe while tufting, this information can also be found in the manual accompanying your AK-I Cut Pile Tufting Machine.
Should I wear a mask while tufting?
Yes you should wear an FFP2 mask while tufting. Inhalation of yarn fibres can cause lasting respiratory illness and disease. The severity and incidence of respiratory symptoms, illnesses and chronic diseases is linked to the concentrations of airborne fibres (dust) that a person is exposed to and the number of years a person is exposed. The severity is also linked to the types of fibres a person is exposed to, for example exposure to extremely high (industrial) levels of cotton dusts and other dusts from vegetable fibres such as flax, hemp or sisal has been linked to respiratory lung disease (Byssinosis).
Make sure you also wear your mask while cleaning and disposing of fibre dust, for example while hoovering, emptying the hoover and while cleaning your machine. Do not try to clean your tufting area by sweeping up loose yarn and dust, this can cause a larger circulation of harmful fibres in the air. Hoover regularly or use wet cleaning techniques.
Are tufting guns loud?
Yes, Tufting Machines are an electric power tool and make a louder noise than modern sewing machines. Care should be taken to protect yourself when tufting by wearing ear protection, such as earplugs or ear defenders. Unfortunately most noise cancelling headphones are not sufficient to protect your hearing. If you would like to listen to music or podcasts while tufting, look for headphones or earbuds that provide ear protection and are compliant with European Safety Standard EN352.
How can I protect my pets from a tufting frame?
The nails on carpet grippers can cause serious injury to skin and you must keep children and pets away from your tufting frame at all times. Securing thick foam, with a depth of 2cm or more, on all of the exposed nails on your frame can reduce the risk of contact but injuries can still occur if your frame is in an area where it is easily accessible and unmonitored. Some tufters opt for using staples instead of carpet grippers to reduce these risks whilst others have built collapsible frames that they can safely store away when not in use.
Rug Tufting Glue
Curious about the best way to finish your tufted project? Get valuable insights on the best adhesives and how to apply them.
What glue is needed for tufting?
Once you've finished tufting you'll need to apply a primary glue to the back of your piece in order to secure the tufts of yarn in place. The most commonly used glue in rug tufting is latex. Professionals in the hand-tufting industry favour latex due to its liquid consistency, which allows for even coverage of every yarn tuft. Latex also provides the necessary dimensional stability to the rug whilst still allowing it to remain flexible.
If you are making cut-pile wall hangings, pillows, or other decorative objects for the home that won't be placed on the floor and do not require flexibility, you can use any standard PVA glue. This also has a liquid consistency to penetrate through the fabric, ensuring there is a layer of glue to hold each strand of yarn nicely in place.
If you are using a punch needle or other loop pile technique to make small projects for your home you do not necessarily need to use a primary glue to secure the loops of yarn in place, the esteemed Amy Oxford (The Oxford Company) recommends finishing punch needle rugs and other projects with an under-padding rather than using an adhesive.
What glues can I use to make a rug?
For anyone making rugs by hand with a tufting machine we recommend using natural latex to secure your tufts, natural latex is the absolute gold standard in the hand-tufting industry.
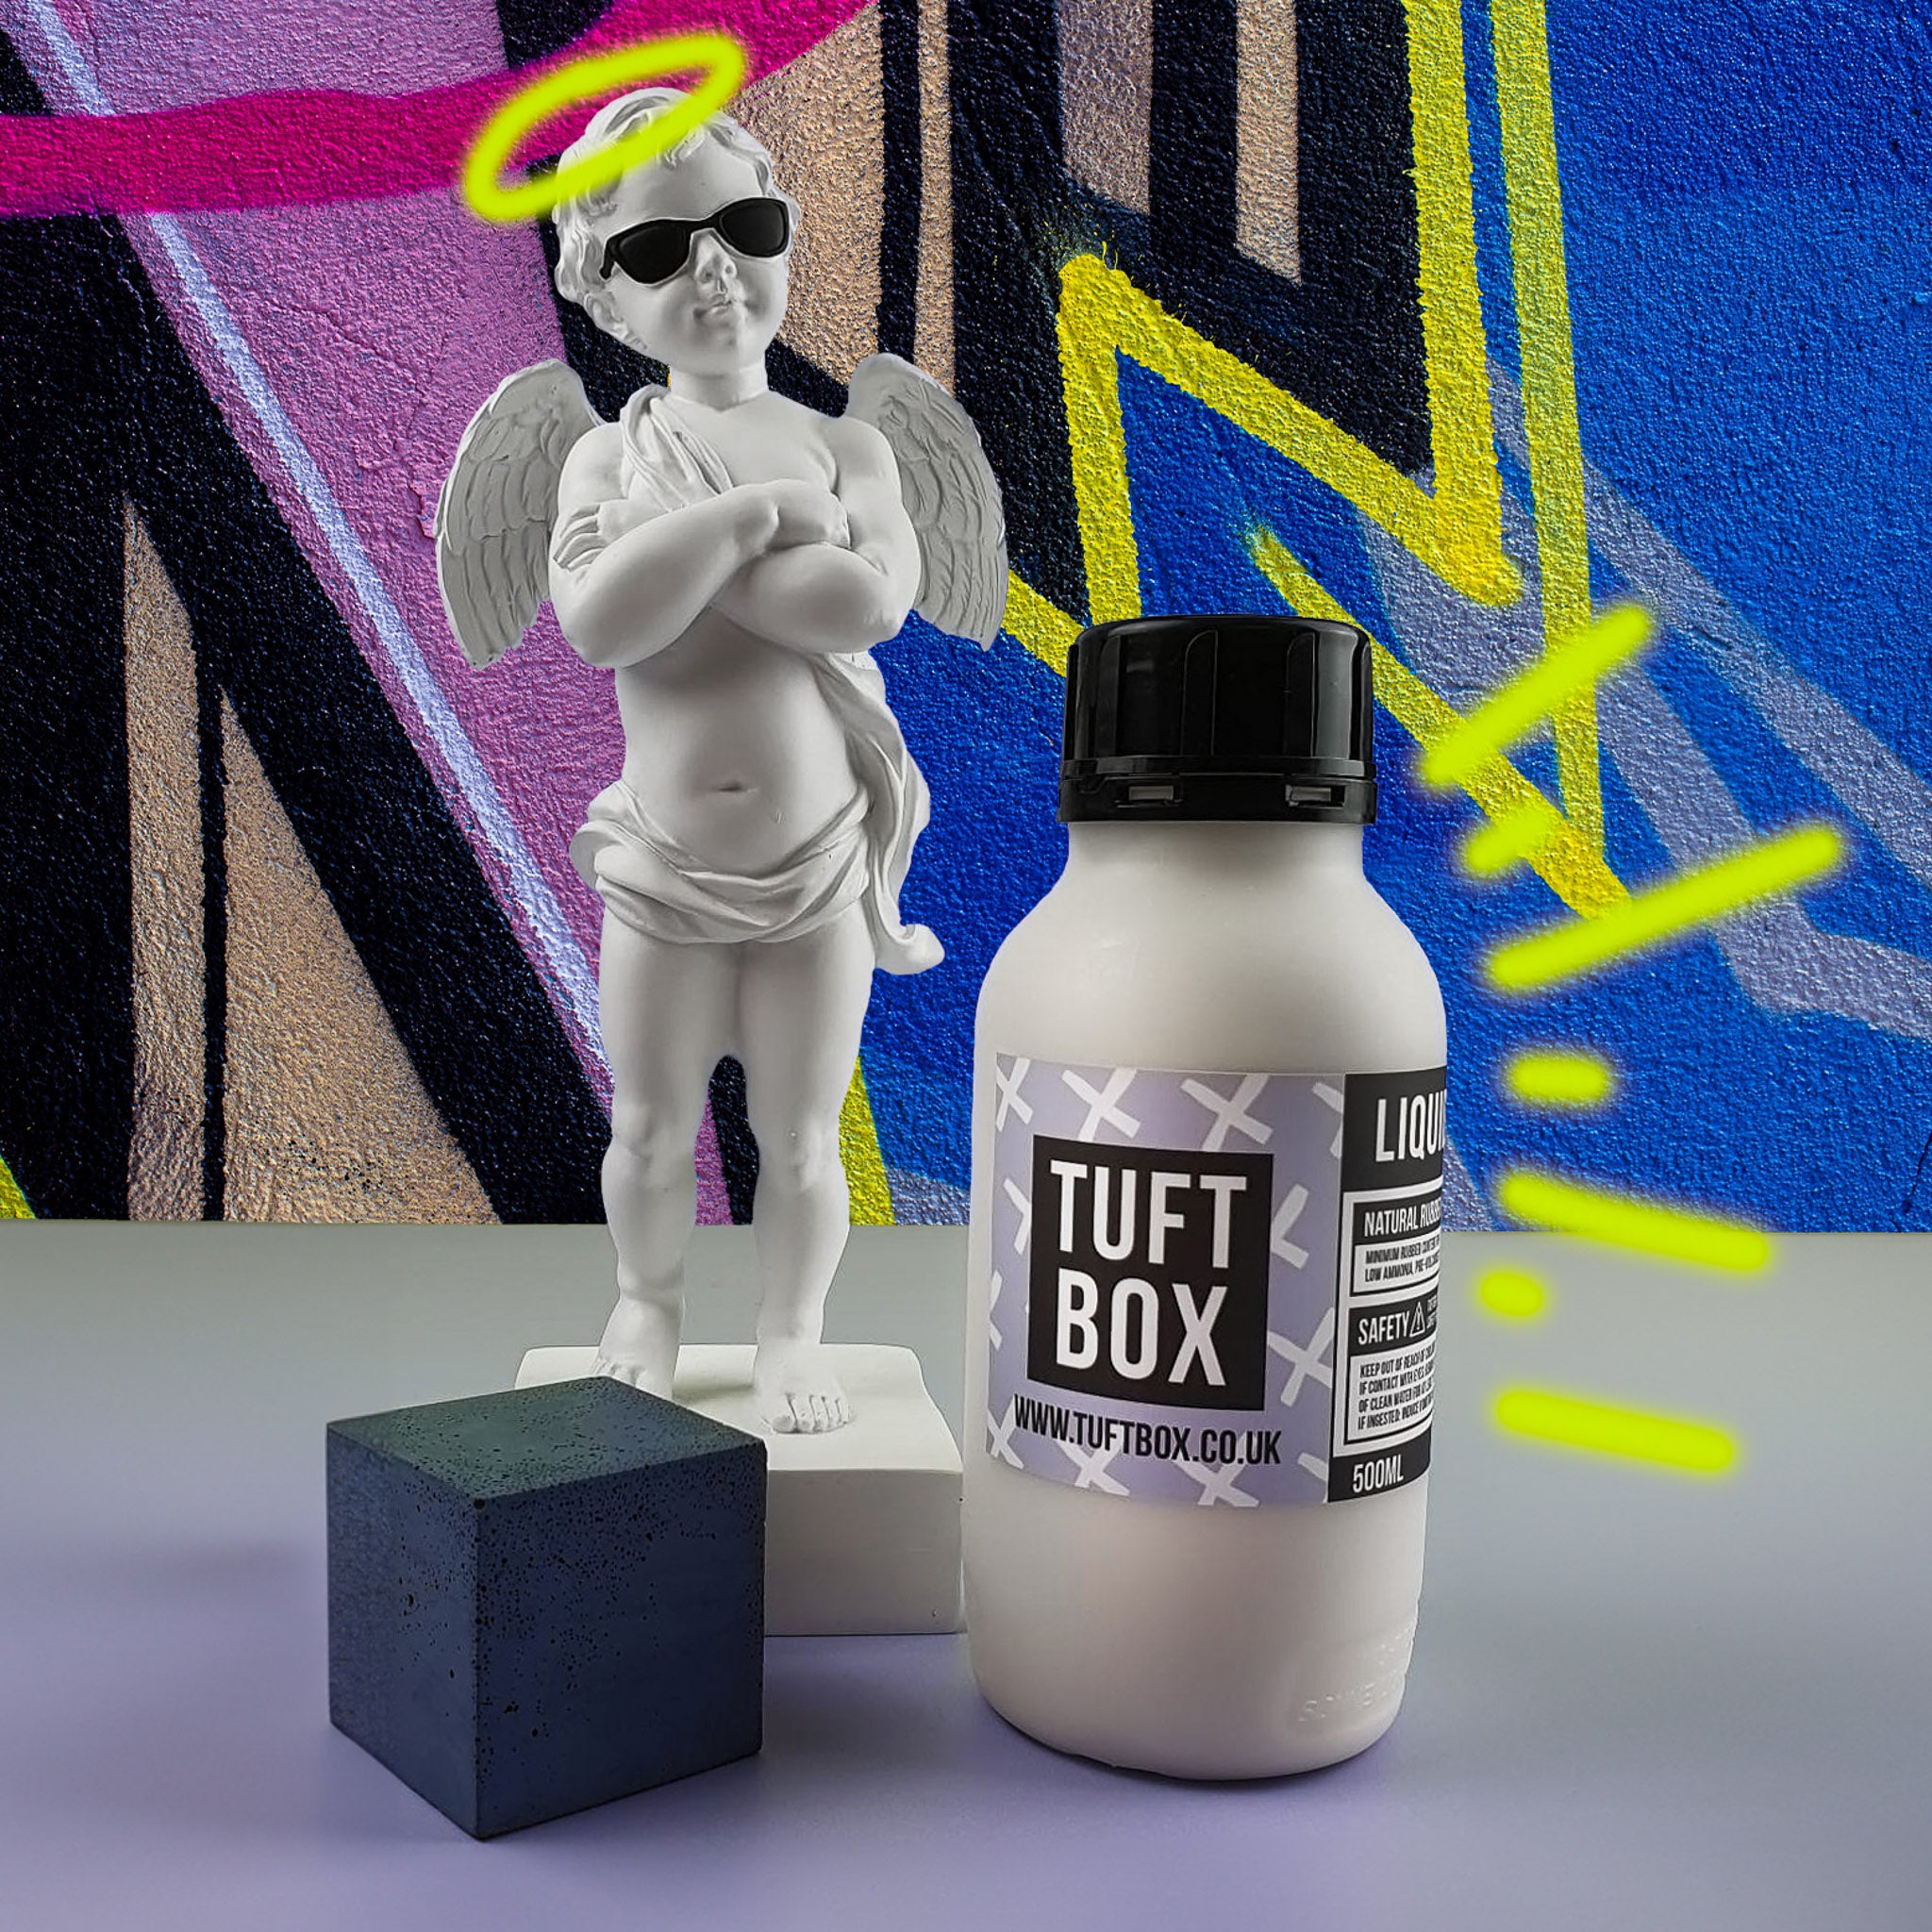
What is liquid latex?
Liquid latex is used in the special effects industry for creating SFX makeup, masks, bald caps and prosthetics. It is also used in many casting and mould-making applications. Liquid Latex is the most commonly used adhesive for sealing hand-tufted rugs and latex backing is used on 95% of carpets worldwide. Liquid latex is usually made of natural rubber latex, water and a small percentage of ammonia (<1%) to increase shelf life and control the pH of the solution. SFX latexes will have a low latex concentration, whereas latex for rug making will have a higher concentration of latex.
Why is latex the best glue for tufted rugs?
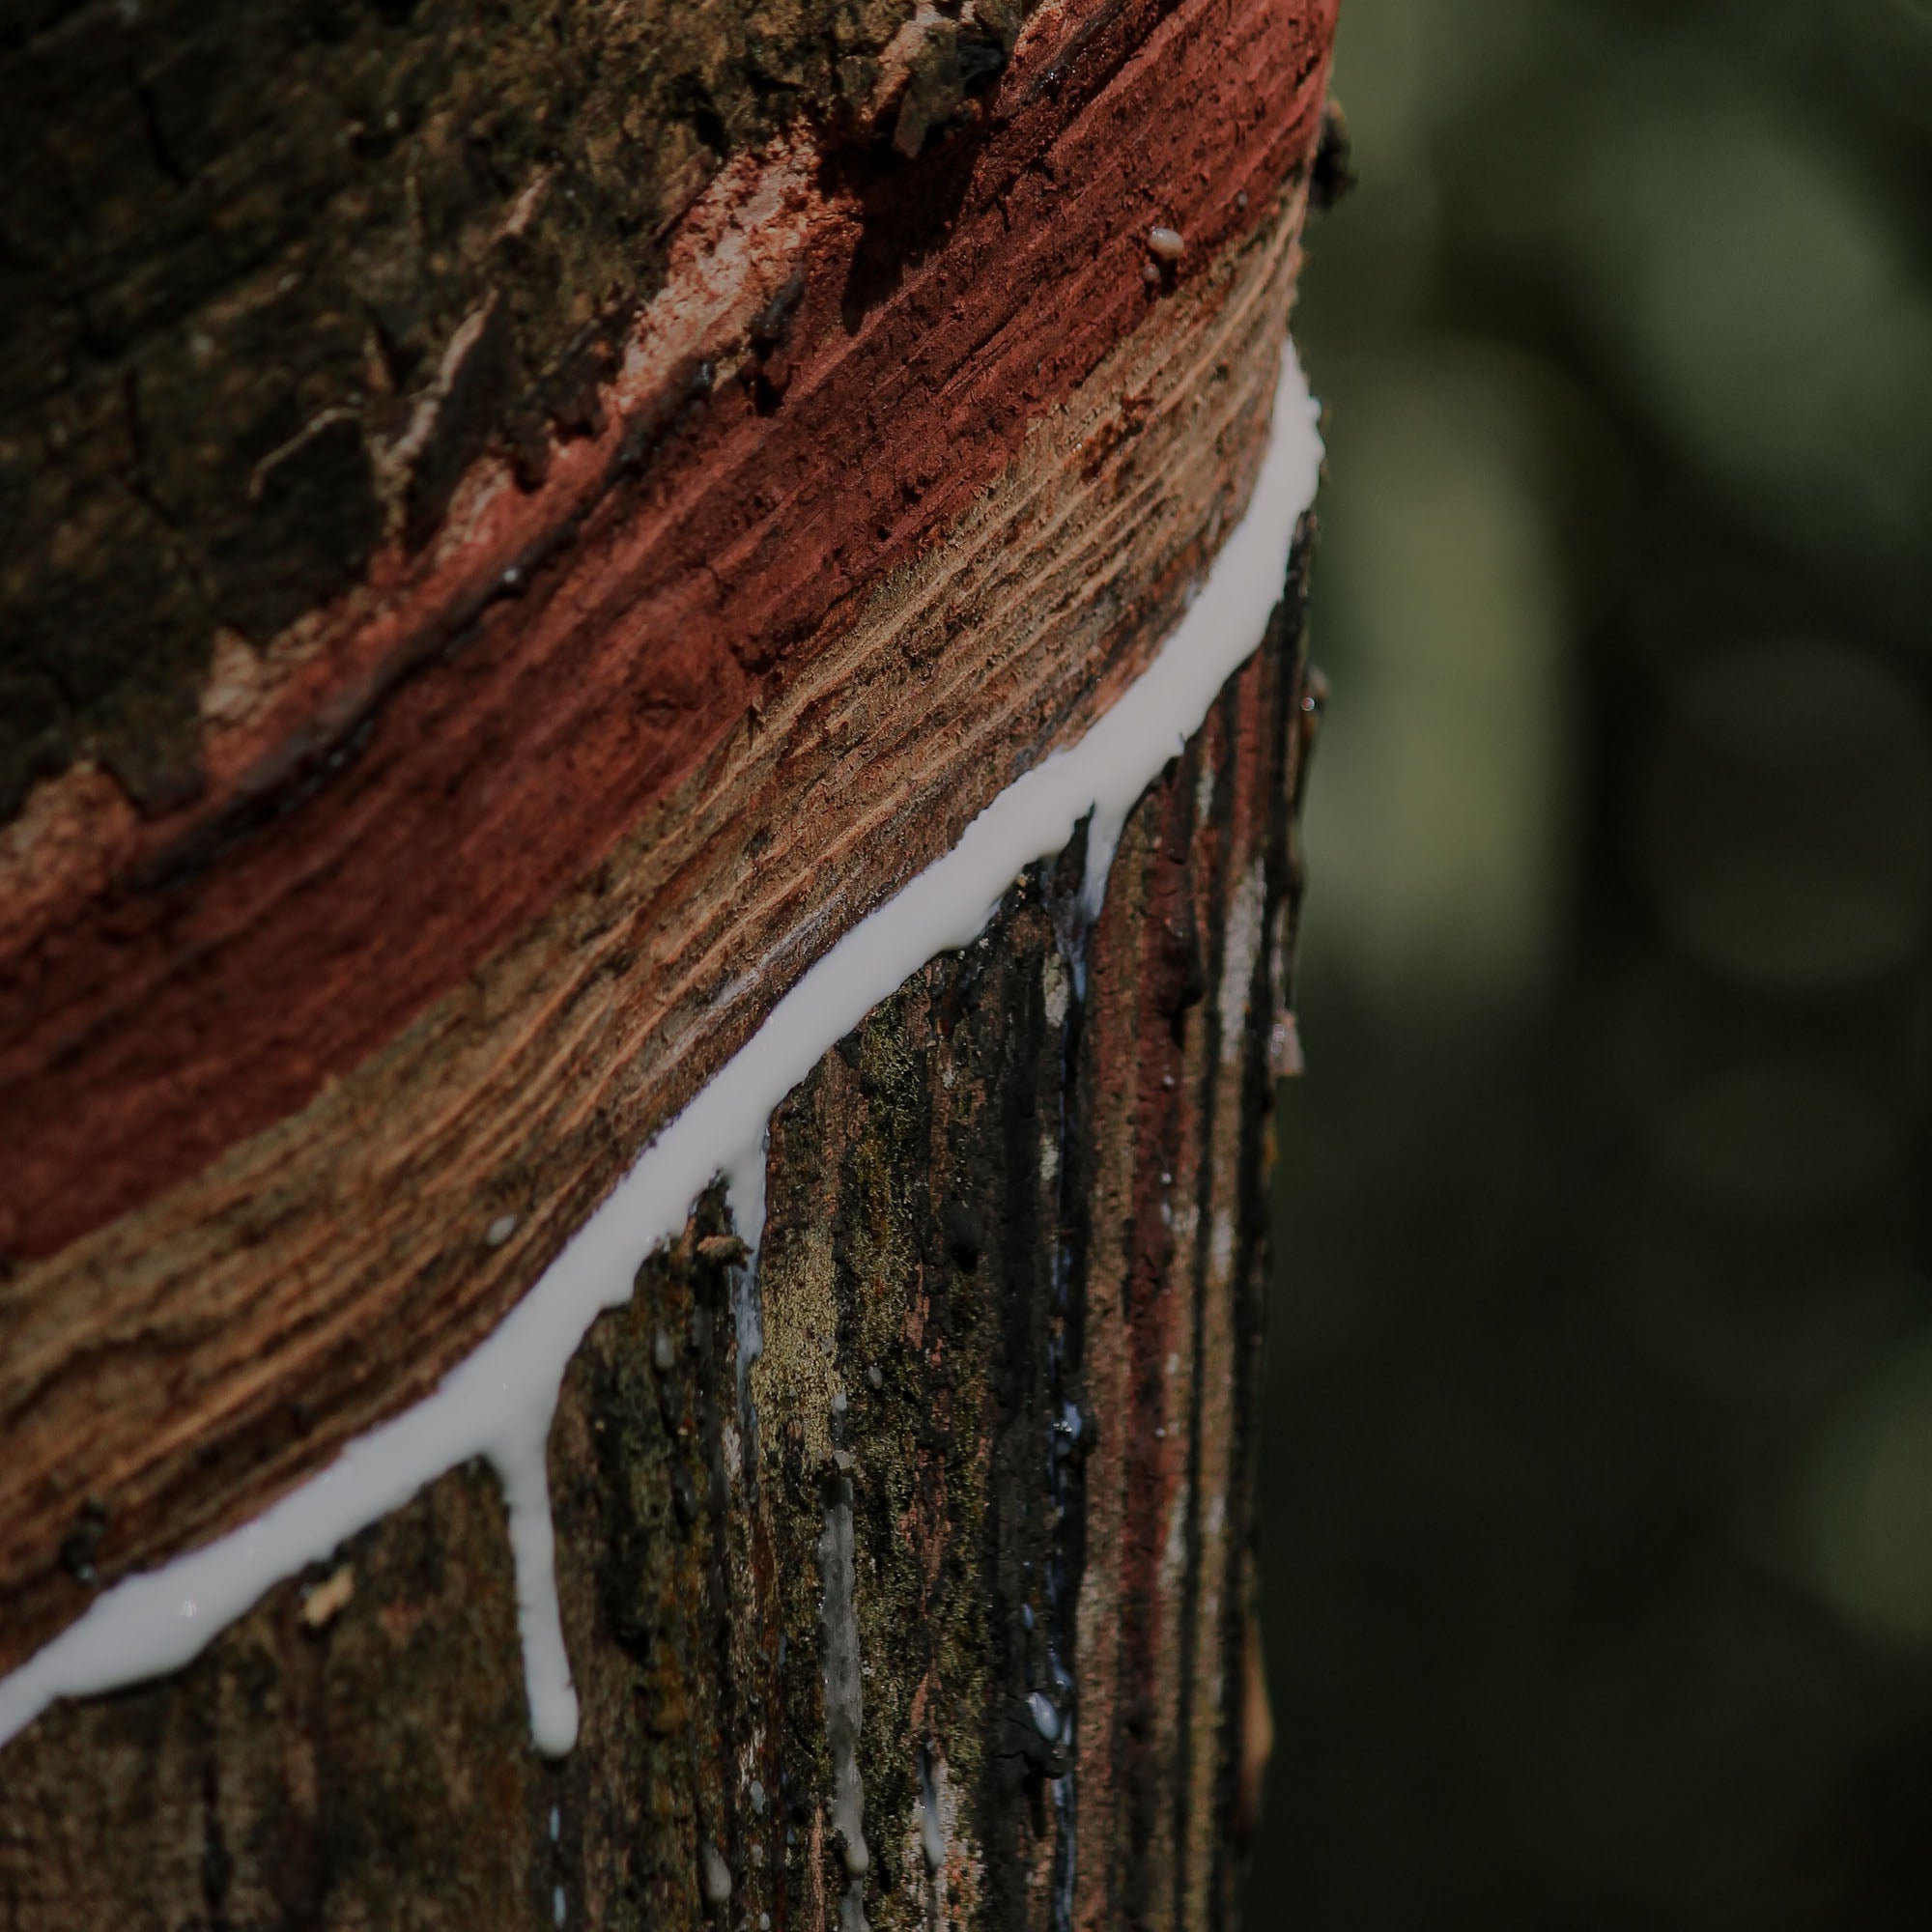
The best type of adhesive for hand-tufted rugs is natural rubber latex, an organic raw material that comes from rubber trees and thousands of other flowering plant species (including dandelions! 🌼). Natural latex is a sustainable, renewable, carbon-negative and an eco-conscious choice of material that has fantastic properties for rug making:
- Liquid consistency - penetrates the primary tufting fabric ensuring even coverage of the rug pile and a bond with every thread of yarn
- Dimensional stability - helps the rug maintain its original size and shape over time, so you can enjoy it for years to come
- Flexibility - Makes rugs more flexible, so they are easier to roll up and transport, great for shipping rugs to customers or when you're moving to a new home.
- Non-Skid - Rugs backed with natural latex have impressive non-skid qualities, making them safer to use on hard-wood flooring in high-traffic areas and reducing the need for applying extra non-slip backing to a rug
- It works! - Latex backing is used on 95% of carpets worldwide. Liquid latex is safe to use with all types of yarns, any type of backing whether natural or synthetic and works for rugs designed for any type of flooring surface e.g. carpet, hard-wood and even heated floors!
Be mindful that not all products labelled as liquid latex are genuinely made of natural latex rubber! Some are actually synthetic latex which is a man-made version of natural latex. Tuftbox only distributes liquid latex that is made from natural latex. Our liquid latex is eco-conscious, 100% free from animal by-products and it has the perfect properties for backing your rugs.
What is the difference between synthetic and natural latex?
Check out our post on the important differences between man-made and natural rubber latex.
Does liquid latex smell?
Yes, liquid latex contains a small percentage of ammonia which increases shelf life and controls the pH of the solution. Ammonia is not a VOC but it does have a distinct odour which is similar to that of cleaning products, some people describe the smell as being sharp or caustic. Tuftbox liquid latex is low-ammonia and has a mild smell which dissipates quickly as it dries.
Is liquid latex dangerous?
Tuftbox only distributes liquid latex that is made from natural latex. This liquid latex is eco-conscious, 100% free from animal by-products and it has the perfect properties for backing your rugs. It does not contain VOCs and is not hazardous to health or the environment. It is safe and used in the production of medical goods, moulds and is even applied directly to the skin by SFX make-up artists. Due to the presence of ammonia, liquid latex may cause mild irritation on contact with eyes and skin, or mild irritation to the nose in the event it is used in a room without adequate ventilation. Latex is also an allergen, and may trigger an allergic reaction in some people. Latex allergy is uncommon in the UK affecting less than 1 in a 1000 people. People with latex allergies must avoid this product or take proper measures to ensure their safety when using. You must read the Liquid Latex Material Safety Data Sheet on this product before use.
When should I glue my tufted piece?
You should always apply glue to the back of your tufted piece whilst it is stretched on the frame, this ensures that your fabric retains its shape. If you remove your piece off of the frame before applying your adhesive it will likely curl.
How do i apply liquid latex to my rug?
Once you have finished tufting you can apply a coat of Liquid Latex with our easy Rug Latex Roller Kit. You can also use a large disposable paint brush or sponge and a paint tray if you have one at home. Here are some steps to one of our favourite parts of the rug making process - painting with latex 😍:
- Make sure you are working in a well-ventilated area and that your floor surface is protected underneath your tufting frame. Latex is not removable from fibrous materials, especially carpets! So be careful during the application process.
- With your rug still firmly stretched on your frame, paint the back of your rug with the liquid latex like you would paint a wall at home.
- Apply an even pressure so you have a proper distribution of the latex. The perfect pressure will allow the glue to penetrate slightly through the primary backing fabric.
- To test if you used the right pressure, roll your latex onto a small section of your rug, part a section of tufts on the front of your rug. Look to see if the glue has come through the primary tufting fabric. You should see the glue on the fabric at the base of your yarn strands. You don’t want the latex glue to penetrate deep into the pile.
- The amount of pressure needed can change depending on the density of your tufting fabric and the density of your pile, always check results by testing the latex on a small area before applying it to your entire project.
- Once you’ve got your pressure perfect, continue painting the entire back of your rug.
- Allow the glue to dry for 12 to 36 hours before unhooking and handling your final piece.
If you are making wall hangings, pillows or other decorative items that aren't going on the floor you can also use these tips for applying a PVA glue to your piece! There may be some changes to dry time for PVA depending on the thickness of your glue and application layer.
How to add secondary rug backing using liquid latex?
If you would like to add a mesh secondary backing (such as our Cotton Mesh Rug Backing) you will want to apply this while your first layer of latex is still wet and tacky. Keep your rug on the tufting frame and stretch the cotton mesh onto the frame also. Apply a second thicker layer of latex. Once the latex has fully dried and cured you can cut your rug off of the frame by cutting into the primary tufting fabric, a utility knife is the best tool for clean cuts but you can also use any type of scissors. Be sure to leave a border of 2.5 - 5cm (1 - 2”) around your rug in order to fold this edge over during finishing.
You can also use liquid latex to; glue down the edges of your primary backing fabric, add a different fabric backing and to add rug binding tape. You will want to apply the latex to both surfaces and attach the two fabrics together by applying even pressure. Whilst the latex is curing you should periodically apply pressure to make sure both layers are still in contact with each other.
Please Note: The Liquid Latex we distribute is low viscosity and when used on a fibrous material it will tend to flow both on and through the fibres of the material. This means the latex will adhere very firmly and will be essentially permanent. The latex starts as a white colour and dries to a light amber colour. For these reasons it is always a good idea to test the latex before committing to a large area, to make sure the glue works well with your specific materials and does not cause any damage or discoloration. We recommend you do this for any new material or type of glue you are using.
Why isn’t my glue sticking to all the strands of yarn?
You are likely using a glue that is too thick to penetrate the pile effectively, we recommend Liquid Latex for rugs and PVA glue for finishing other projects, both have the right viscosity to penetrate every tuft. If you are using a natural liquid latex and still finding that some of your tufts are loose after glueing you might not be using enough pressure when you are applying your glue, check out our guide above for tips on applying liquid latex.
Tufting Techniques
Ready to master the craft of rug making? This section has expert advice on techniques including; handling your machine, carving clean lines and finishing the edges of your tufted rug so it’ll stand the test of time.
What are the top techniques for tufting?
Here are our top tips for adopting a good tufting technique:
- Direction - Your tufting machine can only move in the direction that the foot is facing e.g. if you want to tuft to the right, the foot of the gun needs to be facing to the right. Unlike punch needle, when tufting with an AK-I machine you will be tufting in the direction of the closed side of the needle.
- Tufting curves - Tufting curved lines can be a difficult technique to master for tufting newbies. Curves can sometimes cause the machine to snag on the fabric, especially at higher speeds. If you are a beginner try filling in shapes in your design by tufting horizontal and vertical lines only. Once you are familiar with your machine, you can experiment with pulsing the trigger (applying small bursts of power) while tufting curves for greater control over your speed and direction.
- Pressure - You will want to maintain consistent pressure, make sure the foot of the tufting gun is always in contact with your fabric while tufting.
- Speed - Good tufting technique needs to have the right balance between the speed of the tufting machine and the speed that your hands move the gun, you’ll learn over time how to adjust this to get the best results for the fabric and yarn you are using. For example, if you want to achieve better coverage while working with thin yarn, try moving your gun slowly with the machine set to a high speed. This will create tighter spacing between each tuft and more yarn per line. If you are new to tufting we recommend starting with your tufting machine at its lowest speed and then practising with higher speeds as you get more comfortable handling your machine.
How much space should I have between my tufted lines?
The ideal spacing between your tufted lines will depend on what yarn you are using and your stitch rate (the speed that you move your tufting gun and the speed of your tufting machine).
Laying your tufted lines closer together will create a more dense pile. There is a limit to how much yarn you can pack into one area and this limit will vary depending on the type of fabric you are using and the weight of your yarn.
Placing your lines too close together, overlapping your lines, or tufting repeatedly over the same line could damage your fabric.
When working with our rug wool or acrylic yarn you will achieve great results by leaving a small gap between each line that you tuft. You can also experiment with leaving a slightly larger gap between different sections of colour to achieve more defined lines when carving.
How can I transfer a design to the tufting fabric?
There are three methods for transferring your designs to your tufting fabric:
- Freehand - Directly drawing your design onto the fabric using a marker pen
- Projection - Projecting the design onto the fabric and tracing. You can do this by using a projector or by printing out your design, sticking it behind the cloth and shining a light through the back.
- Gridding - An art technique which involves dividing an image into a grid of squares and then reproducing the image on a larger scale square by square. A great technique for tufters who are not totally confident in freehand drawing but not looking to add a projector to their initial tufting budget! Check out the helpful video and free Grid Drawing Tool by ArtTutor.
Keep in mind that you'll always be working from the back of the rug so whatever design you draw on the back should be a mirror image (horizontal flip) of the final design that you want to see on the front. This is especially important to remember if you're including written words in your work!
How should I carve my rug?
This is totally up to you as the artist! For a sleek finish some tufters like to even out the pile across the whole rug, whilst others prefer to get creative with trimming to add definition and texture to the lines and shapes in their designs.
We have a variety of carving tools that can help you achieve great results in your tufted designs.
- Use the Rosewood Rug Carver to trim, round and shape your tufts. You can also pair the carver with this Shearing Guide to shave your entire rug at the same height, the guide will help you to achieve a more uniform and sleek even pile.
- Check out our Duckbill Shears for carving details by hand. The shears have an angled blade to help you achieve super clean detailing, whilst the large duckbill design will keep your other rug tufts far away from your blade as you trim.
- Tweezers are a useful tool for achieving precise details, helping you to move individual tufts and make sure every piece of yarn is laying in the right section of your design. We stock a stainless steel Tweezer Set that has 4 great tools for yarnscaping, including pointed tools for separating your lines between different blocks of colour and flat-headed tools for safely moving your tufts to exactly where you want them. They are also a great tool for weeding strands of yarn before you apply your glue.
- Small embroidery scissors and thread snips can help you to make micro-cuts in your tufted design. They are great for carving very tiny details, especially if you like to integrate small details into your tufted design using punch needles. We love these Putford scissors from Canadian designer Paula Sibbald. They have sharp durable blades, come in awesome colours and, despite their miniature size, they have larger finger holes than standard embroidery scissors making them the perfect tool for hands of all sizes.
- Carving gets messy pretty quickly, we love to use these cute bear-shaped lint scrapers to remove excess fluff as we sculpt.
Should I carve my rug while it is on the tufting frame?
Carving and detailing can be done both while your rug is on the frame and after you have applied glue and secondary backing. There is no right way to detail your rug, experiment with different techniques to see what effects work best for your designs. If you are looking to create distinct clean lines, or there are things in your design that need to be legible such as letters or words, it can be helpful to carve each colour on the frame before you apply a new colour. Carving a block of colour before you lay the next block of colour can help the tufts to lay neatly next to each other rather than intermixing.
How can I avoid snipping a hole in my rug while carving?
Take it slow and easy, especially if you are using an electric trimmer or scissor. Always test new machines and tools on a practice piece or in a small and inconspicuous area of your rug, this will help you with getting the right speed, pressure and positioning before carving your main rug designs. Always be mindful of the angle of your clippers or scissors and make sure you are working in bright light.
Can I shave or cut a loop pile rug?
Technically yes! For projects made using loop pile tools like a punch needle or a loop-pile tufting gun you can manually cut each yarn loop or shear the surface to expose the ends of the fibres. Depending on the tools you have available this can be a time-consuming process and often results in an inconsistent pile. You will get much better results by using a cut pile tufting gun.
Do I have to secure the edges of my tufted rug?
The edges of a rug or any tufted project are its most vulnerable point, they are the most exposed to wear and tear from foot traffic and vacuuming. While it may be tempting to use a quick and cheap fix for finishing your tufted rug, such as glueing down edges of your primary tufting fabric and then glueing a secondary backing like felt on top, it's important to know that this technique will not stand the test of time. Without a proper edge finish, the edges of your tufted rug will start to break down, layers can separate and tufted fibres can become loose, fraying and unravelling over time. In just a few years (or less in areas with foot traffic) your rug will likely be tattered enough to warrant the bin 🫣. To ensure the longevity of your hand-tufted rug, especially if you plan to use it in your home or sell to customers, it's best to invest in a proper edging technique.
How can I finish the edges of my rug?
Most hand tufted rugs are finished by two different methods:
- Binding - Binding the edge of a rug involves wrapping a strip of fabric around the edge of the rug and securing it in place via adhesive or stitching. In commercial rug making, this is typically done by a specialist tape binding machine.
- Whipping - Rug whipping typically involves the use of a specially designed machine (similar to a serger or overlocker). A whipped edge is created by wrapping a yarn or thread around the edge of the rug. This technique is typically more expensive than binding and creates a higher-end look. Some whipping machines also have over-edging capabilities where the edges are reinforced with an additional row of stitches beyond the standard binding or serging. Over-edging is typically used for high-traffic areas where the rug is subjected to extra wear and tear.
If you plan to use your tufted creation as a floor rug, you might want to consider having it finished professionally. Some rug and carpet repair specialists might be able to provide serging and binding services at reasonable prices. You could try reaching out to local rug stores or carpet manufacturing businesses for recommendations. Our understanding is that most commercial rug finishing and edging machinery is generally designed to work with linear shapes, such as rectangle or square rugs.
If you are looking to experiment with these finishing techniques for your rugs at home, they can definitely be achieved without a specially designed machine! We have lots of products that can help you to edge your handcrafted rugs:
- Rug Binding - We offer 3 different varieties of wide herringbone rug binding. For smaller projects you can also try our 25mm herringbone rug binding which is available in bold and vibrant colours. These bindings can be secured to the edges of your rugs by using adhesive or by hand sewing to your project using a strong needle and waxed thread.
- Rug Whipping - By threading a whipping needle with our wool or acrylic yarn you can manually create a whipped edge by using a simple whip stitch. You can either match your yarn to the colour of your rug or use a contrasting colour for a more dramatic effect.
Why do I see some fluffy rugs in stores without edging?
These are likely machine-woven rugs, not hand-tufted rugs. You may not see traditional rug binding or serging on the edges of rugs that are woven by machine because the edges have been reinforced during the manufacturing process to prevent them from fraying or unravelling.
Rug Tufting Yarn
Learn how to choose the right yarns, discover the best yarn feeding methods and find out how to estimate the amount of yarn you’ll need to tuft your dream rug.
What yarn can I use in my tufting gun?
Our tufting yarns are specially curated to work flawlessly with the authentic AK-I Cut Pile Tufting Gun:
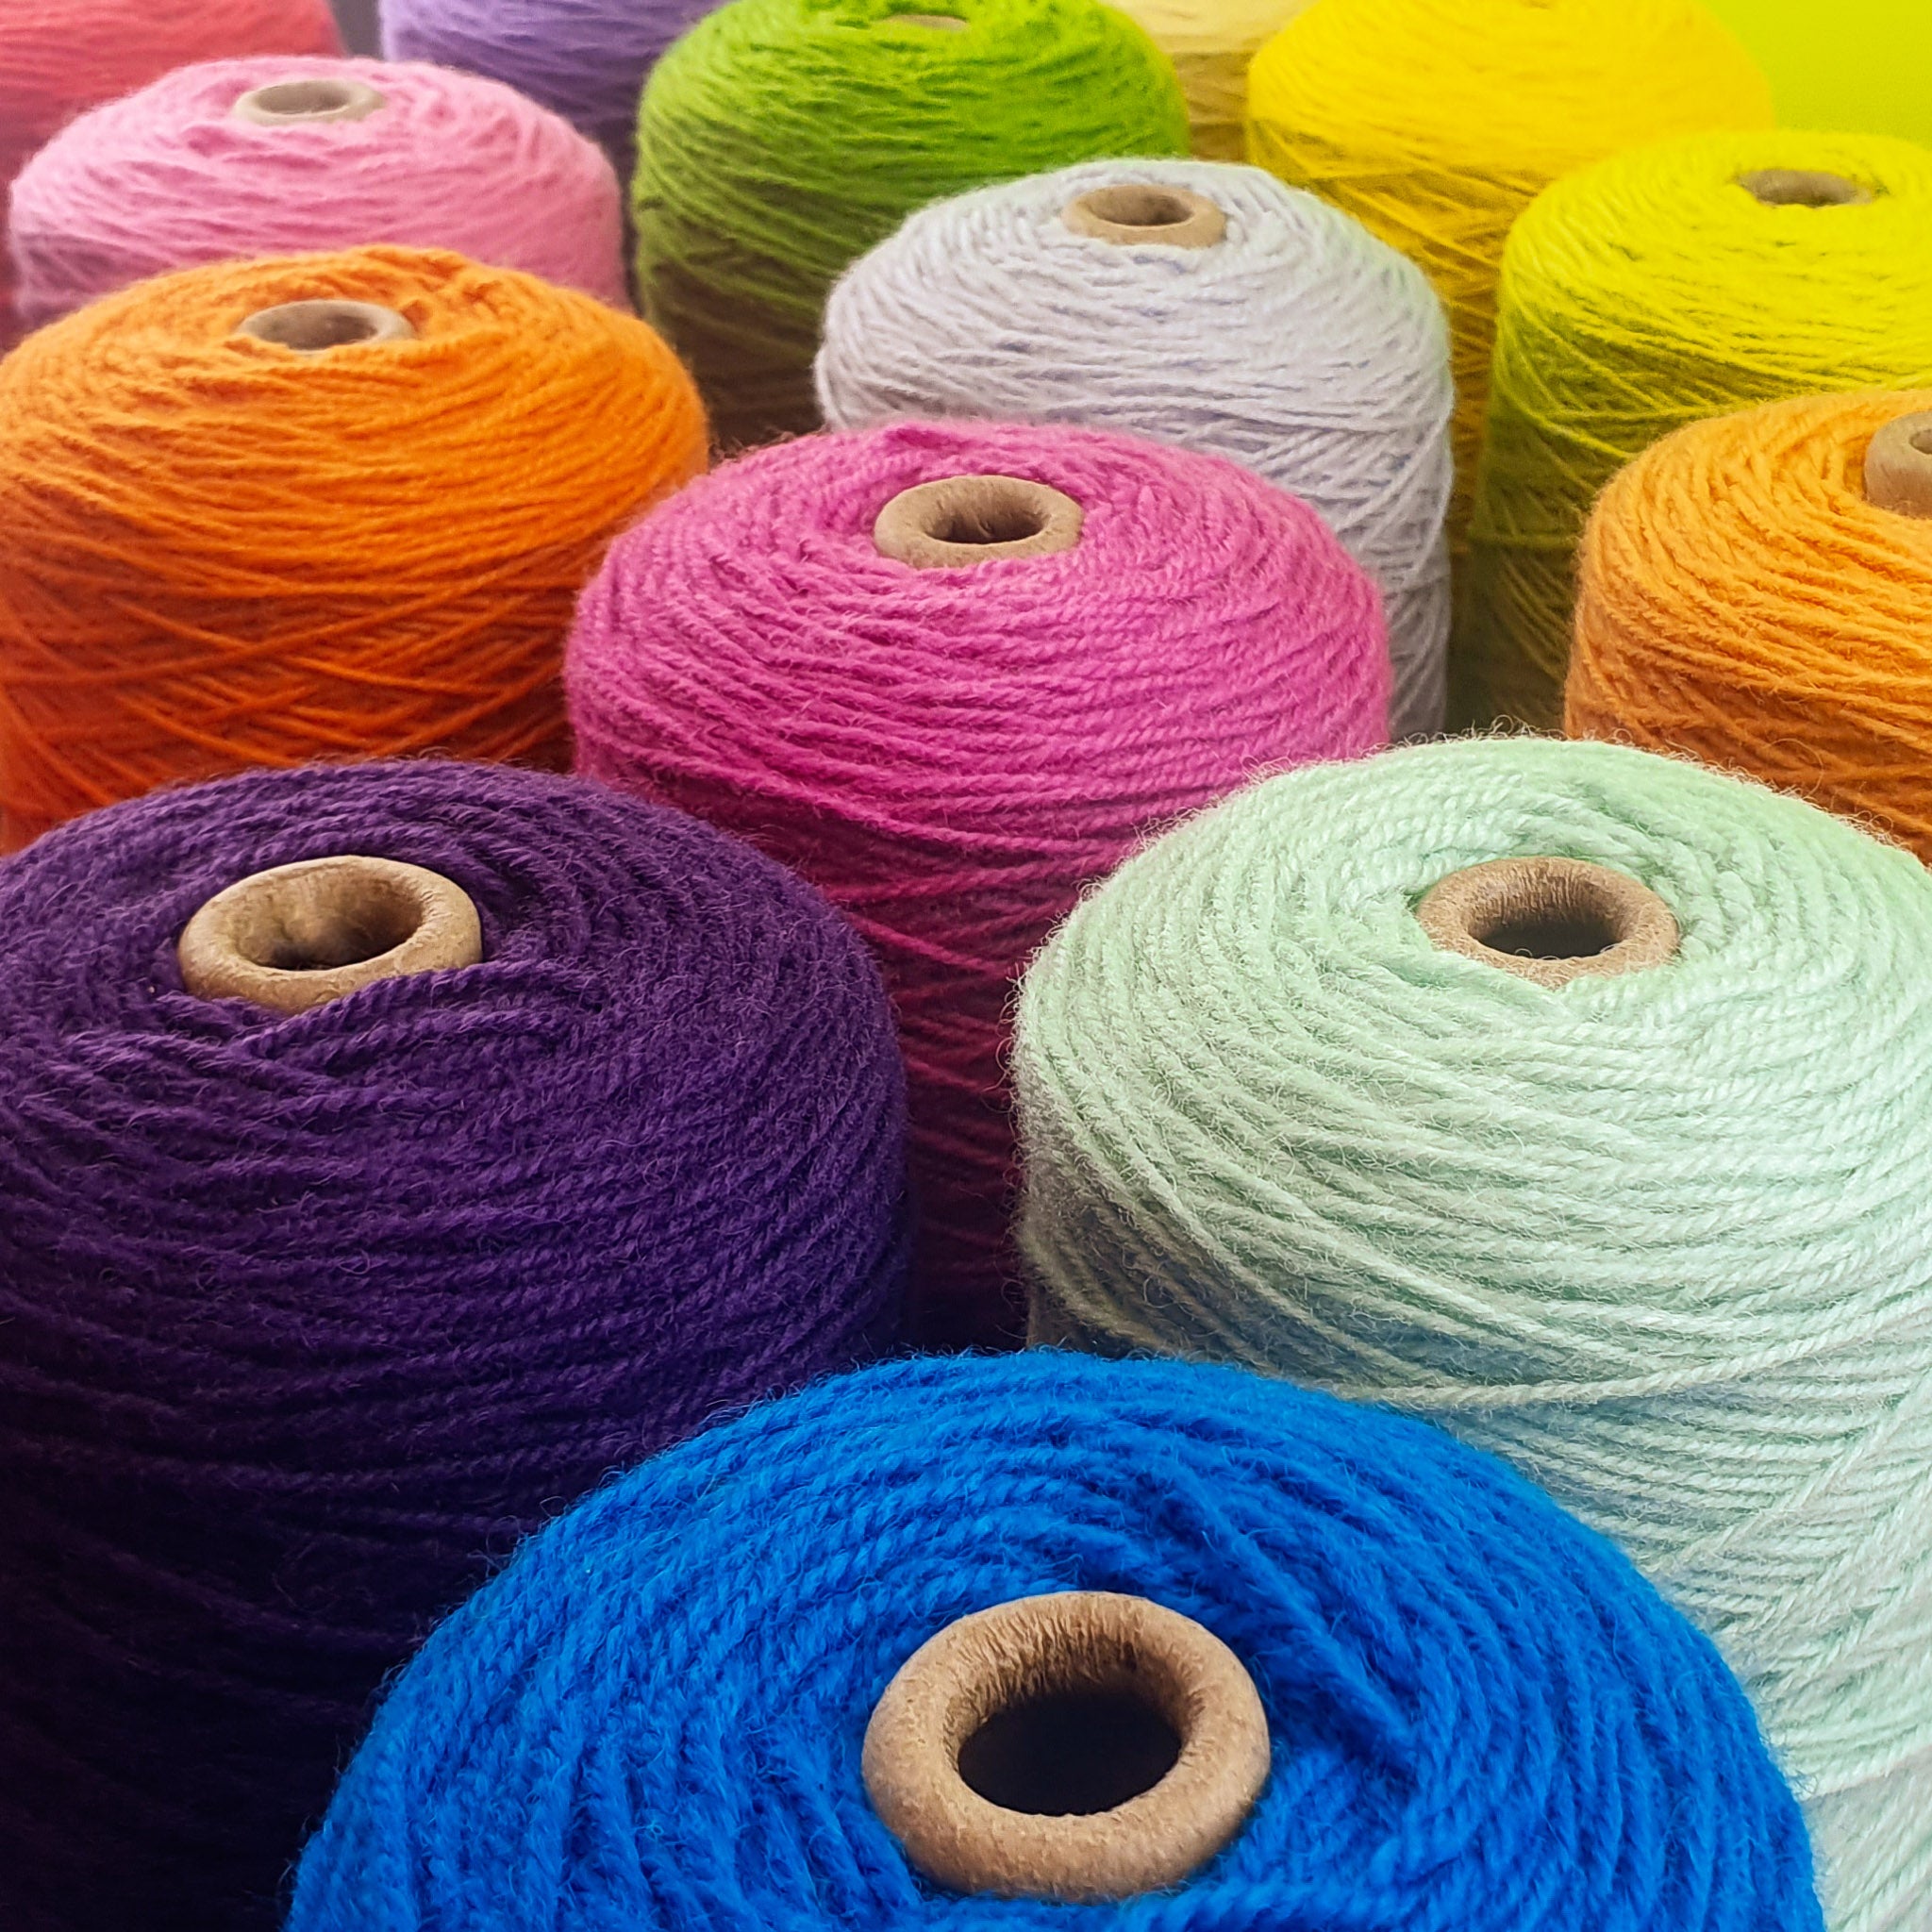
- Tuftbox Rug Wool is a 100% New Zealand Wool Yarn. With a yarn count of 3/37, two strands of our rug wool are perfect for achieving professional, fluffy, high-density cut-pile rugs with your AK-I. It comes on pre-wound 500g cones so no need to spend hours winding your yarn. We’ve hand selected 38 vivid colours that are sure to elevate your next tufting project. Check out our Rug Wool Sample Card to experience the quality and hues of our wool first-hand.
- Red Heart Super Saver® 100% acrylic yarn is the perfect yarn for affordable cut-pile tufting. Two strands of Super Saver® yarn in your AK-I will create a soft, fluffy pile that can be easily carved to create high-detail, clean tufts. With 68 solid colour options you should have no trouble finding the perfect colour for your tufted design. Super Saver® is made in the US and is OEKO-TEX® Standard 100 certified. The yarn is wound into easy to use 198g pull skeins.
What are the differences between wool and acrylic yarn?
Wool has been used to make rugs for millennia, yes that’s right millennia! 👀 Wool is the traditional fibre used in carpets and hand-tufted rugs and for very good reasons, here are a few of them:
- 🐑 100% Natural - Wool is a natural protein fibre which grows naturally on sheep. It is made of keratin like human hair. Wool is naturally safe. It is non-allergenic, antibacterial and free of harsh chemicals.
- 🫗 Dirt-Resistant - The waxy coating on wool fibres makes wool resistant to dirt and staining. Rugs and carpets made from wool are super easy to spot clean.
- 💪 Strong - Wool fibres are jacked 🏋️, they can bend 20,000 times without breaking and they can stretch to more than 30% of their length and still return to their original shape. A rug made from wool will be durable and resilient. It will stand the test of time and maintain its appearance even in high-traffic areas.
- ☁️ Soft - Wool is the ultimate material for cosiness. Soft and warm, its tactile benefits are unmatched by synthetic fibres.
- 🧯 Fire-Resistant - Wool is naturally flame resistant, even exposed to heat above 570°C wool will not melt onto skin, it can even self-extinguish, preventing the spread of a flame. Wool also emits less smoke and toxic gases than other fibres. This makes wool carpets and rugs one of safest choices you could make for your home.
- 🌬️Purifying - Rugs or wall hangings made from wool fibres have been shown to improve air quality in indoor spaces, wool acts as an all-natural filter absorbing harmful contaminants such as sulphur dioxide and nitrogen.
- 🌍 Eco-Friendly - Wool is 100% renewable, as long as there is grass to eat sheep will continue to grow a new fleece every year. Due to its durability, wool is routinely upcycled and reused, reducing landfill disposal. When wool does reach the end of its long life-cycle it is 100% biodegradable. In the right conditions wool will decompose in 2-24 months releasing valuable nutrients back into the soil.
Acrylic is a synthetic man-made fibre, here is a breakdown of its benefits and limitations:
- 🌈 Vibrant colours - Synthetic yarns can typically achieve more vivid colours than natural yarns, so if you’re looking to tuft in brights and neons this is likely the yarn for you!
- ☁️ Soft - Acrylic yarn is lightweight and super soft.
- 💸 Wallet-friendly - Acrylic is cheaper than natural fibres and an excellent option if you are on a budget or looking to practise tufting without breaking the bank.
- 🖼️ Aesthetically pleasing - Acrylic is a fantastic choice for creating vibrant and textured tufted art including wall hangings and tapestries, scatter cushions and other home decor projects,
- 👎 Poor Durability - Wears quickly and is prone to fraying and fuzzing. Acrylic yarn is not suitable for floor rugs, especially in high traffic areas.
- 👎Environmental Impact - Microplastics from acrylic fibre contribute to 85% of human-made debris along both fresh and saltwater shorelines worldwide. Acrylic yarn is not biodegradable, it is a plastic and takes centuries (200+ years!) to break down in a landfill. Acrylic is also not sustainable, its production process is heavily dependent on fossil fuel extraction.
Can certain types of yarn damage a tufting gun?
This depends on what tufting machine you are using. The scissors or blades on cut-pile tufting machines are designed for cutting through yarn, whereas a loop-pile machine may be tolerant of alternative materials such as fabric strips. When using non-pneumatic cut-pile tufting machines (like the AK-I) you should avoid tufting with very smooth, silky or shiny yarns which tend to slide out of the scissor mechanism, resulting in skipped stitches and machine jams. For effective cutting you will want to choose yarns that are coarse in texture like wool. To prevent machine damage we also recommend avoiding; any type of unspun yarn (roving), slub yarns, super fluffy / lumpy / hairy yarns, very soft yarns, mohair, bouclé, chenille, tweed yarn, plarn and other hard yarns, and most novelty yarns such as; faux furs, metalics and yarns with extra trims like nubs, bobbles, tinsel, pom poms, sequins, beads, lace etc.
What is yarn weight?
Yarn thickness is often referred to as the “weight” of the yarn, and it’s usually categorised into different weight classes. Yarn classifications differ across the world, for example very thick yarn could be categorised as a #6 in the US and called ‘Super Bulky’ but here in the UK we might call it ‘Super Chunky’. Understanding yarn thickness is essential for any fibre artist - whether you are a tufter, a knitter, a weaver or any other crafter! The thickness of the yarn you choose will determine the final look and feel of your project.
How thick should my yarn be for tufting?
High-quality tufting machines are engineered to handle a range of different yarn types and weights. To achieve optimal rug density, the needle eye of the tufting gun should be full with yarn, while still being able to pull the yarn through the needle eye without excessive force.
With thinner yarn you might need to thread your tufting gun with many strands to create a dense pile. In contrast, when tufting with thick yarn you may only require one strand in your needle.
Changing the speed on your tufting machine can help you to achieve better results when working with different yarn weights. If you want to achieve better coverage while working with thin yarn, try moving your gun slowly with the machine set to a high speed. This will create tighter spacing between each tuft and more yarn per line.
You can also experiment with different combinations of yarn weights to achieve your ideal rug pile. For example, 3 strands of one thinner yarn might not work well but combining 2 strands of the thin yarn with 1 strand of a different thicker yarn might tuft great! When using a new yarn or a new combination of strands be sure to test it out on the edges of your frame before you start to fill in your design.
How much yarn do I need to tuft a rug?
The amount of yarn needed to tuft a rug depends on; the size of your project, your line gauge (the distance between each tufted line), your stitch rate (how tight the space is between each tufted strand), your pile height and the weight of your tufting yarn.
To fill the frame in our starter kit expect to use around two cones of Tuftbox Rug Wool or five skeins of Red Heart Super Saver®.
When planning your rug and purchasing yarn, it’s always best to have too much of a colour than to run out mid-tuft.
How can I calculate the cost of yarn per rug?
If you are looking to sell your rugs or already selling 🤑 and you would like a more professional calculation for cost of materials we recommend:
- Weigh your selected yarn (e.g. If you are tufting with two strands of wool, place both cones on the scales)
- Tuft an exact 30 x 30 cm square using your standard technique. By this we mean make sure you tuft the square with your typical line gauge (distance between each line) and your typical stitch rate (the usual speed you would move the gun up the fabric and the usual speed you would set your tufting machine at) and your usual pile height.
- Weigh the yarn you started with again.
- This will give you an approximate calculation of your typical yarn usage that you can use in your future cost calculations:
- (Starting Weight g - Finish Weight g) / 30 = grams of yarn per cm2.
- (Rug Length cm x Rug Width cm) x grams of yarn per cm2 = grams of yarn needed for rug
- The cost to buy your yarn (£) / the weight of the cone or skein you buy (g) = Price of yarn per gram
- Grams of yarn needed x price per gram = total yarn cost per rug
What is the best yarn feeding method?
A yarn feeding system is an essential part of your tufting set up. For a smooth tufting experience you’ll want your yarn to flow effortlessly from a cone or cake all the way to the needle of your tufting gun.
The Tuftbox Rug Tufting Starter Kit is supplied with a frame that has a built-in yarn feeder. The feeder has two dowels to hold two yarn cones in place. Positioned above the dowels are two eyelets to help feed the yarn into your tufting gun without snagging or tangling.
If tufting with our wool yarn, you can simply:
- Place two cones on the dowels
- Pass the yarn strands through the eyelets on the frame
- Bring the yarn strands together and pass through the eyelet on your tufting machine
- Thread both strands through the eye of the needle on your tufting machine.
If tufting with our acrylic yarn we recommend the following steps
- Wind the skein into two cakes of yarn using this yarn winder
- Place the cakes either loose on the floor (careful with the floor technique, the yarn cake will bounce everywhere! 🥲) or pop your cakes in a bucket or bin
- Pass the yarn strands through the eyelets on the frame
- Bring the yarn strands together and pass through the eyelet on your tufting machine
- Thread both strands through the eye of the needle on your tufting machine.
If you are looking to build a bigger tufting frame we recommend copying the yarn feeding system from our Starter Kit frame 👍 You can buy wood, dowels and eye screws from most home improvement stores e.g. Wickes or B&Q.
If you are an experienced tufter looking for a professional yarn feeding solution for 3+ cones, you’ll want to shop for a ‘mobile creel frame’. Creels allow for standardisation of the yarns path and enable more accurate directional and tension control. They are typically constructed of steel with multiple horizontal or vertical rods to stabilise several cones of yarn. Small mobile creels have wheels so they can be repositioned as you move to tuft around the frame.
Do I have to wind my yarn before tufting?
If you’re using yarn that comes as a ball, skein or hank, we recommend winding it into a cake or onto a cardboard cone before tufting, this will ensure your yarn unwinds consistently without tangling. You can make yarn cakes with this easy to use yarn winder, which will clamp to any standard table in your home.
My yarn won’t stay threaded in my tufting gun!
Here are some things to check if your yarn is continuously falling out of your tufting machine:
- Check that you are using a yarn that is compatible with your tufting machine and that your yarn is the right weight. You can find more information about the best yarns for tufting in this section of our FAQs.
- Make sure you are tufting from a cone or a cake and that you have a good set up for feeding your yarn into the machine.
- Check whether there is anything interfering with the flow of yarn e.g. whether the machine cord or anything else in your workspace is catching on your yarn
- Make sure you are threading your tufting gun correctly.
- Read through our top tips on tufting techniques.
- When you finish tufting a line, sometimes pausing before slowly pulling your machine out of the fabric can help you to avoid having to re-thread your tufting gun.
Tufting Fabrics
Wondering if burlap, hessian, or other fabrics can be used for tufting? Need some tips and tricks to stretch your fabric tight? Wondering what the difference is between primary tufting fabric and secondary rug backing? We've got you, click the boxes below for the answers to these and more.
What is primary tufting fabric?
Tufting rugs requires a specific type of fabric that serves as a base for punching the yarn into. Commonly referred to as ‘primary backing fabric’, ‘primary tufting fabric’, or ‘primary tufting cloth’, this fabric is an essential component for crafting hand-tufted rugs. Tuftbox offers premium-grade primary tufting fabric that is the industry standard and used by professional rug tufters for commercial clients such as hotels.
What is the best primary fabric for tufting?
Primary backing fabric needs to have both the right thread count for the gauge of the needle on your tufting machine and the right strength as you’ll be putting your weight behind the gun whilst its needle is punching the fabric several times a second! The best primary tufting fabrics are made from woven polyester, this is the fabric most commonly used by the hand-tufting industry worldwide. Polyester is much stronger than cotton and can withstand the pressure of the tufting machine. Polyester is also not affected by humidity whereas cotton absorbs moisture, cotton-based primary tufting fabric can become saggy on the tufting frame with just a slight change of humidity! Tuftbox’s primary tufting fabric is made of 100% polyester with the perfect thread count for your AK-I Tufting Machine using any of our yarns.
Can i tuft with burlap or hessian, monks cloth or other fabrics?
When using fabrics that are not specifically manufactured for machine tufting, such as burlap or monks cloth, you will face challenges like; yarn falling out of the fabric mid-tuft, having to restretch your fabric often and, more often than not, having to deal with holes, tears and rips. If you are a beginner, we highly recommend that you start your tufting journey with a fabric that is designed for rug tufting, we promise you will have a much better time! Our starter kits come with enough primary tufting fabric to fill your frame up 4 times so plenty of the right fabric to start your tufting journey.
For more experienced tufters that have got the basics down you can absolutely experiment with different primary tufting fabrics. You’ll want to adapt your techniques to minimise rips, for example modifying your speed and avoiding non-linear movements. Our Hessian tufting fabric is a high-quality jute that can be used to make rugs. It is very difficult to machine tuft and it is not suitable to use if you are looking to sell your tufted creations to customers but it is a very affordable and eco-friendly option for crafters who are looking to experiment and test different tufting techniques.
How should I stretch the fabric onto my tufting frame?
Make sure you check out our comprehensive guides on tufting frames for helpful tips on what type of frame you will need for tufting. Once your frame is set up, you will want to prepare your primary tufting fabric. You need your cloth to be a bit larger than the external dimensions of your frame, we recommend allowing for 5-10 cm of excess fabric on each side.
The next step is to place your fabric loosely on the frame, making sure there is enough cloth on every side. Working from the top of your frame first, hook the top of your fabric onto the nails of your top carpet gripper. Next take the bottom of your fabric and pull it down tightly, hooking it to the carpet grippers on the bottom of your frame. Then you can pull each side of your fabric so it hooks over the carpet gripper nails in the same way.
It is normal for your tufting cloth to separate slightly where it attaches to the carpet grippers on the frame. If you are using our primary tufting fabric, it is very strong and durable, you can pull much harder than you would expect! You will want your fabric to be very taut, similar to the way that you would stretch a painting canvas. If part of your fabric isn’t tight enough you can unhook that section and stretch again. Continue reading this FAQ for our top tips on checking if your fabric is tight enough.
How do I know if my tufting fabric is tight enough?
Here are our top tips for checking your fabric tension once you’ve stretched it on the frame:
- Visual Test 👀 - Look at the fabric's surface and check for any wrinkles, sagging, or looseness. If you see any of these, keep stretching! If your fabric has grid lines, use these as a guide, a curvy or wavy grid line can show that one part of the fabric is stretched more tightly than another.
- Pinch Test 🤏 - try to pinch your fabric between your fingers and thumb in different places, if you can grab any fabric it’s too loose.
- Poke Test 👉 - poke your fabric all across your frame if there is an area that you can push your finger in further than in other places, keep stretching that side.
- Sound Test 👂 - Flick the fabric with your fingers in different areas (be careful of the grippers!) and listen out, it should make a sharp, crisp drum-like sound. You’ll be able to find areas that might not be tight enough as they will make a different, more muffled and muted sound than the areas that are stretched tightly.
My tufting fabric is not hooking onto the carpet grippers
The nails in carpet grippers are angled so that they can hold the fabric in place. If you find that your cloth is not sticking to your carpet grippers or you cannot get your fabric taut no matter how tight you pull, it might be that your carpet grippers are not oriented correctly on your frame. Most carpet grippers have arrows to indicate direction, you want all of the arrows pointing away from the centre of your tufting frame. If all your arrows are pointing in the right direction and your fabric is still saggy it might be that you are using the wrong tufting fabric, find out more about the right fabrics for tufting rugs by reading through our FAQs.
My tufting fabric is becoming loose while tufting
Check that you are using the correct fabric for rug tufting by reading through the "Tufting Fabrics" section of our FAQs. Fabrics made from cotton absorb moisture and are likely to become loose on your tufting frame. Also check that you have the right orientation for your carpet grippers (the arrows should be pointing away from the centre of your frame). If you have built a very large frame it might be that you need to install more carpet grippers or angled nails around the edges of your frame, a thicker band of nails will help to keep a larger piece of fabric taut.
What is secondary rug backing?
Backing fabric (also known as secondary backing or final backing cloth) is applied to the back of a tufted piece, after the yarn has been sealed with glue. Backings are typically applied to rugs and carpets using latex, which creates a strong, durable bond. This extra layer of fabric provides many benefits, including:
- Adding a cushioning layer to make the rug or carpet softer and more comfortable to walk on.
- Helping to prevent slipping or sliding of the rug or carpet.
- Giving strength and stability to the piece.
- Protecting the underside from dirt and moisture.
- Improving the overall appearance of the piece by covering the tufted stitches on the back.
What fabrics can I use to back my rug?
There are many different options for backing fabrics:
- Mesh Backing - Mesh fabric is the most commonly used backing for hand-tufted floor rugs. It looks like netting and typically is made from cotton or polypropylene (Action Bac®). If you are interested in backing your rug like the pros we offer an affordable Cotton Mesh Rug Backing which is perfect for backing your rugs using our Liquid Latex.
- Jute - Jute is a traditional fibre used in tufted carpet backing materials. It is a natural fibre that is sustainable, environmentally friendly and biodegradable. Our Hessian Tufting Fabric is a refined woven jute fabric that can be used to back your rugs.
- Heavy Fabric Backing - Rugs can also be finished using a heavier woven fabric that provides both a durable and luxurious finish. We offer a Black and White Premium Rug Backing that will make the back of your rug look nearly as good as the front!
- Felt - Felt is another common fabric used in carpet and rug construction due to its natural cushioning properties. Its spongy texture adds an extra layer of comfort underfoot, and also helps to improve sound insulation. Felt is also known for its durability and ability to withstand heavy foot traffic. We stock a viscose/wool mix felt in five bold colours which is an affordable backing option for novelty and craft rugs.
- Anything else! - get creative and have fun experimenting with different types of fabrics for your rug backing! Upcycle fabrics from your stash or look for fabrics that are strong, hard-wearing and will provide good support and cushioning for your rug. Non-traditional backings can give your tufted creation a unique and personalised touch.
Do I need to use secondary backing for all tufting projects?
Backing fabrics are not necessary for tufted creations that will not be placed on the floor or subjected to any wear and tear, you can simply seal your tufts with an initial layer of glue! When designing your tufted creation or other home decor project, consider what you will be using it for, if the back of the tuft will be on show you might want to opt for a backing for aesthetic reasons.
Tufting Frames
A tufting frame is one of the most important pieces of equipment in your tufting set up. A great frame will hold your fabric super tight as your tufting machine punches the fabric several times a second! In this FAQ section, we answer your burning questions about tufting frames including why you need one and how you can find the best frame to fit your tufting projects.
What is a tufting frame?
A tufting frame is a vital piece of equipment used in the manufacture of hand-tufted carpets and rugs, it is designed to hold a primary backing fabric taut. Tufting frames are generally constructed of wood, with carpet grippers around the edge of the frame. The carpet grippers have sharp angled nails, pins or tacks that hook into the fabric enabling the primary tufting fabric to be stretched tightly and held vertically in place.
What is the best type of tufting frame?
If it’s your first time using a tufting gun we strongly recommend that you start with a small frame. The Tuftbox Starter Kit comes with a frame that is perfect for beginners. The frame is easy to assemble at home and designed to clamp to the edge of a standard tabletop.
If you are looking to DIY your own tufting frame, be sure to check out our tufting frame guide, we’ve listed the top 5 things to consider before you get building!
Does tuftbox sell tufting frames?
Yes! Our Starter Kit comes with a frame that is perfectly sized for beginners. The frame is easy to assemble at home and comes with detailed instructions and everything you will need to clamp the frame to the edge of a standard tabletop. The kit also comes with enough primary backing fabric to fill your frame 4 times, so plenty of fabric to start your tufting journey.
What are the dimensions of the Tuftbox rug tufting frame?
The frame included in the Tuftbox Starter Kit has the following dimensions:
- Total Frame Size: Width: 117 cm, Height 85.5 cm, Depth 7 cm
- Workable Area (Maximum Rug Size): Width 61.5 cm, Height: 70.5 cm
- Minimum Required Fabric Size: Width: 86.5 cm, Height: 95.5 cm
- Minimum Table Width: 87 cm
- Maximum Table Depth: 8cm
How do I build the Tuftbox starter kit frame?
The tufting frame included in the Tuftbox Rug Tufting Starter Kit comes with all of the tools and fixings needed to build the frame. The kit includes a detailed instruction manual with step by step diagrams to help you with assembly.
We provide full after-sales support for all of our customers, if you are having any trouble with setting up your frame please reach out to us at help@tuftbox.co.uk.
How can i build a DIY tufting frame?
Building your own tufting frame is a great option for tufters looking to create a larger or custom-sized frame. The first step is to decide what size of frame you’d like to build, find out more in our guide to the top things to consider when designing your tufting frame. Once you’ve decided on the size of frame you need, here’s a shopping list of the things you’ll need to DIY your own tufting frame:
- Wood
- Wood Screws
- Screw Eyes
- Carpet Gripper Strips
- Power Drill
- Saw (If you are unable to source wood cut to your specifications)
- Hammer
- Protective Gloves
- Eye Mask
- Dust Mask
You can buy all of the above at a standard UK hardware store such as Wickes or B&Q. You should only attempt construction of a tufting frame if you are familiar with the above tools and how to use them safely. You can find some helpful guides on youtube from other tufters who have constructed their own frames.
Is it easy to build a tufting frame?
If you have some experience of woodworking and you know how to use power tools safely, then yes! If you’ve never used a saw or drill before we recommend finding an experienced friend or loved one to help you with constructing your tufting frame.
What size tufting frame do i need?
Check out our guide to the top things to consider when designing your tufting frame. If it’s your first time tufting we definitely recommend that you start with a small frame of 1 x 1 m or less. The Tuftbox starter kit comes with a frame that is perfectly sized for beginners.
What are carpet grippers?
Carpet grippers, also known as tack strips, are typically thin strips of resin bonded plywood with sharp, angled nails. Carpet grippers are used in carpet installation, they are usually fitted around the perimeter of a room. Grippers come in various fixings, some have pre-installed nails for fastening them to a wood or concrete floor, while others have a peel-off adhesive back. Despite their original design for floor carpet fitting, carpet grippers are ideal for keeping a primary tufting fabric in place on a tufting frame due to their angled nails which hook into the fabric. The best carpet grippers for a rug tufting frame have fixing nails for wooden flooring, these nails are easy to hammer into your wooden tufting frame to secure the grippers around the edge of your frame.
What are gripper strips?
Gripper strips are a narrow piece of rubber or leather that have fine metal teeth inserted which are angled in one direction. Gripper strips are a perfect addition to a punch needle or rug hooking frame as when added to each side of a frame they can hook onto a fabric, holding it tightly in place. To maximise their grip, the gripper strips should be added to a curved surface or bent around the corner of a frame to open up the teeth on the strip. Gripper strips are less effective when added to a flat surface. Gripper strips are manufactured in different PPSI (Points Per Square Inch), you should choose your gripper strip PPSI according to the type of fabric you work with:
- A 300 PPSI strip is suitable for stretching burlap and loose weave linen.
- A 380 PPSI strip is suitable for stretching monks cloth and linen.
- A 480 PPSI strip is suitable for stretching fine linen.
Gripper strips are a great solution for creating your own reusable punch needle and rug hooking frames. All gripper strips sold by Tuftbox come in 1 metre lengths and are shipped with a 1 metre long piece of thick (2.5 cm depth) recycled foam which you can use to cover the sharp teeth of the strips.
Can I use gripper strips on a rug tufting frame?
While it is technically possible to use gripper strips on a rug tufting frame, we do not recommend it! Carpet grippers work great with the majority of tufting fabrics (primary backing) and they are a much cheaper option per square metre.
Can I staple my fabric to my tufting frame?
Stapling a primary fabric onto a small wooden frame can be a great solution for punch needle projects and can help to keep fabric taut and prevent it from moving while you work. Stapling does not work as well for rug tufting frames and we do not recommend it. To keep your fabric taut on a large frame and withstanding the pressure of the tufting gun you’ll need to restaple your fabric often during a single tufting session. Carpet grippers are a much more efficient solution.
AK-I Troubleshooting
In this section you’ll find key steps for investigating any snags with your AK-I tufting machine. We’ve got top tips for resolving common problems to ensure you’re back up and tufting in no time! You’ll also find links to more detailed guides if your machine should require any micro-adjustments.
Before you begin troubleshooting, safety first! Always remember to turn off and unplug your machine before inspecting and handling.
Why isn’t my AK-I cutting the yarn?
Your AK-I machine's scissors may not be cutting properly due to one of the following reasons:
- Fibres could have built-up around the scissors of your machine. Follow our guide on how to clean a tufting gun.
- The yarn you are using is either too soft or too silky. Soft and silky yarns can bend or slide before they interact with the scissor blade. Read more about the best yarns for your AK-I.
- The scissor-closer of the machine has been adjusted incorrectly. To test this, make sure your machine is turned off. Rotate the white gear by hand until it completes a 360 rotation. You should see the scissors come out of the end of the needle, perform a cut action and then retreat back into the machine. If the scissors are not closing (performing the cut action) you might need to make a micro-adjustment. Follow our guide to adjusting the AK-I scissor-closer.
- The bolt attached to the white gear has fallen out of adjustment. The bolt should be securely attached at the centre most point of the gear. Follow our guide to checking and adjusting the AK-I gear bolt.
- The foot of the machine has been adjusted incorrectly. The AK-I machine’s needle should be centred inside the foot and the foot should be lined up with the back edge of the needle hole. If this is not the case you may need to perform a micro-adjustment. Follow our guide to adjusting the foot position.
- Your scissors are dull and need to be replaced. This can happen if you tuft often and with fibres other than wool. Contact us at help@tuftbox.co.uk for repair support or to request a replacement scissor piece.
My tufting gun is making a high-pitched sound
If the sound is a slight squeal when you pull the trigger, it is likely that your tufting machine needs lubrication, follow our guide to oiling your tufting gun. If your gun is “beeping” you might be trying to tuft with a yarn that is too thick, learn more about yarn thickness. Another reason could be a jam somewhere in your machine, you might have yarn stuck in the white gear or around the square white bearings on your rods. If yarn isn’t the culprit the problem may be electrical, please make sure you unplug your machine until inspected and repaired. If you purchased your machine from Tuftbox please reach out to us for troubleshooting support by emailing help@tuftbox.co.uk.
My tufting machine won’t turn off!
Don’t panic! Make sure you unplug your machine at the wall socket before troubleshooting. One of these issues is the likely culprit of your AK-I tufting machine not switching off when you release the trigger:
- Sticky Trigger - When excessive force is applied to the machine’s trigger button it can become stuck in an engaged position. This is a simple fix, you can follow our guide to adjusting the trigger screw.
- Misalignment on the machine’s break bar - Every time the lower square bearing moves into the back position it must come in contact with the break bar. The bar is the thin black strip connected to the yellow wire, if on visual inspection the bar is not sitting perpendicular to your machine, you can follow this guide for adjusting the break bar.
- Loose break wire - If the above problems are not the culprit, is possible that the yellow break wire has become disconnected, if so this may need to be soldered back in place. Contact us for repair support by emailing help@tuftbox.co.uk.
The white gear on my AK-I is stuck and not turning smoothly
There are a few reasons why your AK-I machine gear might not be rotating smoothly:
- The bolt attached to the white gear has fallen out of adjustment. The bolt should be securely attached at the centre most point of the gear. Follow our guide to checking and adjusting the AK-I gear bolt.
- The scissor-closer of the machine has been adjusted incorrectly. To test this, make sure your machine is turned off. Rotate the white gear by hand until it completes a 360 rotation. You should see the scissors come out of the end of the needle, perform a cut action and then retreat back into the machine. If the scissors are not closing (performing the cut action) you might need to make a micro-adjustment to push the scissor blades back together. Follow our guide to adjusting the AK-I scissor-closer.
- The upper and lower machine bars have been incorrectly adjusted during a pile height change. Follow this guide for returning your AK-I to factory settings.
- Yarn-jam! Your white gear may not be rotating smoothly because there is a jam somewhere in your machine, such as yarn within the white gear or one of the square bearings. If you can’t locate the jam you can reach out to us for troubleshooting and repair support via emailing help@tuftbox.co.uk.
My tufting machine is cutting and ripping the fabric
Here are the most likely causes:
- Incompatible Fabric - Explore our expert guides on selecting the perfect fabric for your tufting machine.
- Speed - Good tufting technique needs to have the right balance between the speed of the tufting machine and the speed that your hands move the gun, you’ll learn over time how to adjust this to get the best results for the fabric and yarn you are using. Rips in your fabric can occur when you don’t get this balance quite right, for example having your gun at a high speed while moving your hand too slowly. If you are new to tufting we recommend starting with your tufting machine at its lowest speed then practising with different speeds as you get more comfortable handling your machine.
- Overtufting - There is a limit to how much yarn you can pack into one area and this limit will vary depending on the type of fabric you are using and the weight of your yarn. Placing your lines too close together, overlapping your lines, or tufting repeatedly over the same line can damage your fabric. When working with our rug wool or acrylic yarn you will achieve great results by leaving a small gap between each line that you tuft.
- Pressure - You will want to maintain consistent pressure while tufting. Push the needle of the gun firmly into the fabric until the foot of the machine is in contact with your fabric. Make sure you keep this pressure up while you tuft and keep your machine at a 90 degree angle to the tufting fabric.
- Gun Positioning - Your tufting machine can only move in the direction that the foot is facing e.g. if you want to move to the right, the foot of the gun needs to be facing to the right.
- Curves - Tufting curved lines can be a difficult technique to master for tufting newbies. Curves can sometimes cause the machine to snag on the fabric, especially at higher speeds. If you are a beginner you can try filling in shapes in your design by tufting horizontal and vertical lines only. Once you are familiar with your machine, you can experiment with pulsing the trigger while tufting curves or diagonals for greater control over your speed and direction.
My tufting yarn is falling out of the fabric
Here are some common causes for your yarn not staying in your tufting fabric:
- Not enough force - If it’s your first time tufting you are likely not pushing the machine hard enough against the fabric. You want the foot of the machine to stay in direct contact with the tufting fabric. To achieve this, push the needle of your machine into your fabric until the foot is in contact with the fabric, maintain this pressure while you tuft.
- Yarn - it might be that your yarn is too thin or you are not using enough strands! Learn more about what yarn weights work well for your tufting gun and be sure to check out our range of tufting yarns that have been specifically selected to work flawlessly with your AK-I Cut Pile Tufting gun.
- Gun Positioning - Your tufting machine can only move in the direction that the foot is facing e.g. if you want to move to the right, the foot of the gun needs to be facing to the right.
- Incompatible Fabric - It could be that your fabric has too loose of a weave to hold the yarn in place. Discover the best fabrics to use with your tufting machine.
- Loose Fabric - your tufting fabric needs to be stretched very tightly across your frame. Learn the tricks to perfectly stretch fabric onto your frame.
The tufting fabric is coming through to the front of my rug
Little white or grey bits poking through and ruining your beautiful design? 😢 It is likely that your machine is cutting your fabric, tufting little bits of it into your rug. Don’t worry, you can pull or trim these annoying little stragglers before you glue your piece. To fix the issue for your next tuft:
- Make sure you are applying the right amount of pressure while you are tufting. If your tufting machine is not pressed firmly into the fabric, the scissors of your AK-I can catch and nip your fabric as they perform the cutting cycle. Make sure the foot of the tufting gun is firmly pressed into your fabric while you tuft.
- If you are applying the right pressure and you are still having the same problem you may have a minor misalignment between the foot and the needle of your tufting machine. See this guide to adjusting the foot position.
AK-I Adjustments
Click the link below for step by step guides on performing micro-adjustments to your AK-I tufting machine, including pile-height changes and returning your machine to factory settings. You can also find solutions to common misalignment issues to perfect your tufting and keep your machine performing at its best.
TBX BLOGS
Choosing the Perfect Glue for Tufted Rugs: Synthetic vs. Natural Rubber Latex
Top 5 Things to Consider When Designing a Tufting Frame

