


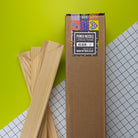
Punch Needle Stretcher Bar Frames
Available in 2 sizes
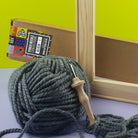
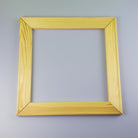
Ready to upgrade your hoop? These wooden canvas bars are the perfect solution for anyone looking to DIY their own punch needle or needlepoint frame. The 4 bars simply slot together (no glue needed) to create a reusable frame for you to stretch your fabric on.
Ideal for punch needle, needlepoint, cross stitch and other hand embroidery, you can use the frame to keep your monks cloth, linen or other needlework fabrics taut and clean. A fantastic solution for your medium to large scale projects like cushion covers and rugs.
You can stretch and secure your fabric to the frame using a staple gun or drawing pins (thumbtacks). Drawing pins are an easy and fast solution that allow you to conveniently re-adjust your canvas as needed while you punch or stitch. These frames are ideal for stretching your fabric ‘drum tight’ - great for punch needle projects which rely on properly stretched fabric for even loops and uniform pile heights.
Check out our handy guide below for instructions on assembling your new frame.
Punch Needle Canvas Frame Sizes:
- 14” Frame Size 35.5 x 35.5 cm - inner working area of 26.7 x 26.7 cm
- 16” Frame Size 40.6 x 40.6 cm - inner working area of 31.8 x 31.8 cm
- Attach the four stretcher bars together by easing the inside-facing grooves into the outside-facing grooves at each of the four corners. (Top Tip: If your bars are connecting very tightly and you are struggling to push them together by hand you can use a rubber mallet to gently tap the bars together).
- Centre your blank needlepoint canvas or punch needle fabric over the bars, making sure that your working area is visible. (Top Tip: Ensure that your design fits within the inner working area of the frame and you have more than 1 cm clearance from the inner edges of the canvas bars).
- Attach your fabric to the frame with staples or drawing pins. Starting in the middle of each side of the frame, affix the outside edges of the fabric to the frame and stretch it from the centre toward each corner. Repeat this process for each side, adjusting the fabric as needed until the entire piece is drum-tight. (Top Tip: Test your tautness by dropping a 20p coin on top of the canvas. If it bounces, the fabric is tight enough and ready for stitching!)
